Dead Ahead
Description
Dead Ahead is a short map that takes place on a road bridge. It has been remade twice since its addition to the game.
Design & Path
The current version of Dead Ahead takes place at night on a road bridge which leads to a tunnel that goes into a mountain. The bridge appears to go over a river of sorts. The bridge is split in two by a black and purple portal, which is placed on black terrain. The bigger part of the bridge is the one on which we can place our towers. This part of the bridge is partially destroyed and appears to be currently being repaired, based on multiple shelves which contain crates and metal pipes on them. There are also a few concrete bricks and rusty containers with rubble in them. Lamps can also be found in the middle of the bridge and the sides of it. The left and right sides of the bridge are blocked by black and yellow walls.
The path starts at a portal and ends at a tunnel. The path is mostly straight, though it takes multiple turns to avoid holes on the road.
The second version of Dead Ahead took place at night on a road bridge between two tunnels that go into two mountains. The bridge appeared to go over a river of sorts. The bridge was partially destroyed, with pieces floating in the sea below. A portal could be seen at one end of the bridge and a tunnel at both ends. There were stone barriers, metal lampposts, roadblocks and orange traffic cones to suggest that this was once a fully functioning road bridge. Additionally, the middle of the bridge appeared to have collapsed.
The stone path started at the portal before taking a relatively straight path towards the tunnel. There were few turns, and the path itself was quite short, making this one of the most difficult maps in the game.
The first version of Dead Ahead took place on a road bridge, though it appeared that this bridge formed a bridge-tunnel complex given that the bridge was in the middle of the sea. At one end of the bridge was a portal and at the other end of the bridge was a road tunnel. The bridge was partially destroyed, with some pieces floating in the water below. There were metal barriers, metal lampposts, roadblocks and orange traffic cones to suggest that this was once a fully functioning road bridge.
The stone path began at the portal before taking a relatively straight path towards the tunnel. There were few turns, and the path itself was quite short.
Interactive Map
Rewards
The game calculates how many 


Any rewards that end in a decimal point is rounded down, no matter the first figure of the leading decimal.
| Difficulty reward scaling for survival mode Coins and Exp is 1.5x. | ||
|---|---|---|
| Mode | Coins/Gem Reward | EXP Reward |
| Easy | |
|
| Casual | |
|
| Intermediate | |
|
| Molten | |
|
| Fallen | |
|
| Hidden Wave | |
|
| Frost | |
|
Strategy
- There is not too much space to place ground towers on Dead Ahead.
- The Turret may take up valuable ground space with its large placement footprint.
- You cannot place towers at the start of the map.
- This means enemies with spawning abilities, like the Dark Necromancer, can accumulate enemies before towers can attack it, if the range of your towers are short.
- There are quite a lot of cliff spots on this map, so the Sniper, Ranger and Mortar are highly recommended.
- However, since the cliffs are relatively small, the player should be careful in order to utilize them.
- It is more likely for players to bring ground towers in this map. The Medic is a great addition as it can remove all stuns with its ability.
- As the path is quite short, towers that slow down enemies, like the Sledger, Toxic Gunner and Electroshocker, are recommended.
- The Brawler is also a great option as it is able to knockback enemies.
- Towers that can apply a chill effect such as the Cryomancer and Freezer can be useful as it can slightly slow down major bosses.
Gallery
Map Icons
-
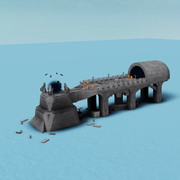 First version (15 August 2019 – 29 October 2020)
-
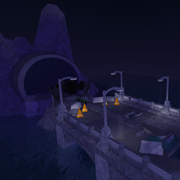 Second version (29 October 2020 – 7 April 2023)


View
-
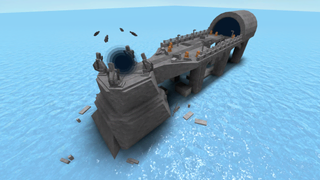 First version (15 August 2019 – 29 October 2020)
-
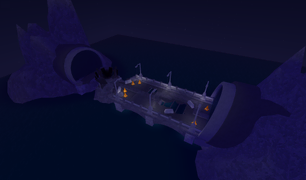 Second version (29 October 2020 – 7 April 2023)


Top Down
-
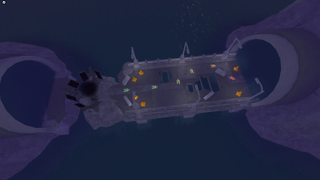 Second version (29 October 2020 – 7 April 2023)

Thumbnails
-
 Current version on the game thumbnail

Promotional Images
-
 Current version on a promotional image.

Trailer
-
First version in the game trailer.

Development Images
-
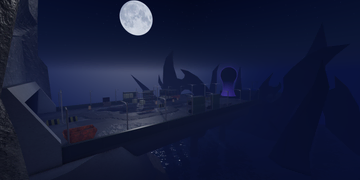 Current version on a development image.
-
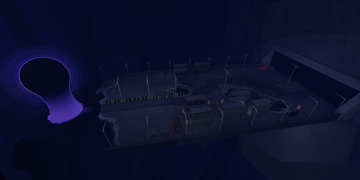 Current version on a development image.


Trivia
- Unlike many other maps that existed prior to the MEGA Update, this map was not remade or removed.
- This was, however, remade in the Overhaul Update.
- Underneath the bridge of the second version of the map, an Easter egg could be seen, which is a picture of a cat in a shower.
Update History
- 15 August 2019 - BETA v1.0.0
- Dead Ahead added.
- 13 October 2019 - Release v1.0.0
- Made playable in Versus mode.
- 4 March 2020 - Release v1.8.0
- No longer playable in Versus mode.
- 29 October 2020 - Overhaul v1.0.0
- Dead Ahead remade.
- Insane difficulty added.
- No longer gives a badge upon first triumph.
- 7 April 2023 - v1.7.0
- Dead Ahead remade.
- Enemies Beta modifier added.
- Bug: You can place towers on some parts of the path.
- 5 June 2026 - v2.0.0
- Enemies Beta removed.

| PVP | ||
|---|---|---|
| Easy | Crash Course • Judging Hall • Laser Stadium • Warm Land | |
| Normal | Desert Oasis • Distant Shapes • Opulent Remains | |
| Sandbox Mode | ||
|---|---|---|
| Hard | Classic Candy Cane Lane • Classic Castle • Classic Forest Camp • Classic Island Chaos • Classic Winter | |
| Insane | Badlands • Rotfield | |
| Special | Dev • Headache Headquarters | |
| Story Exclusive | ||
|---|---|---|
| Easy | Abandoned City | |
| Normal | Severing Connection • Tutorial | |
| Removed | ||
|---|---|---|
| Undefined | Candy Cane Lane • Doomspire • Island Chaos • Subzero • Castle • Mount Amillion • End of the Line • Canyon • Castle Outskirts • Candy Valley • Fungi Forest • Freight Fright • Graveyard • Winter • Robloxia • Ancient Colosseum • Highlands • Voidlands • PVP | |
| Easy | PVP_1 • PVP_2 • PVP_3 • PVP_4 • PVP_5 • PVP_6 • PVP_7 • PVP_8 • PVP_9 • PVP_10 • PVP_11 | |
| Hard | Polluted Wasteland • Nightmare Carnival | |
| Unreleased | ||
|---|---|---|
| Undefined | Backwoods • Battlefront • Castle Outskirts • Dusty Ruins • Fogged Lair • Fraction Zone • Gingerbread Town • Hallows Ville • Mars • Petulance Ground • Pumpkin Patch • PVP_11 • PVP_3 • PVP_6 • PVP_8 • PVP_9 • Unknown Castle Map • Unreleased Halloween 2020 Map • Unreleased Tournament Map • Waste Ground • Weepers Gaol • Winterfall • WIP City | |