
Outpost 16
Outpost 16 has been removed from the game as of the 26th of November 2025 as it was part of the Null & Void Event.
This page has been preserved for historical purposes.
Description
Outpost 16 was the event map for the first night of the Null & Void Event. Like other event maps, this map had a specialized wave structure with special enemies. Players started with a varying amount of cash, based on how many players there are in the match. The rewards received were based on how many waves were survived and if the match was won. This map had two difficulties, Easy and Hard.
Cash was only gained if an enemy is killed, or in some cases, damaged by a specific amount of health. Additionally, the amount gained was a set amount of cash, which was not always equal to the enemy's health. Enemies split their cash between players, regardless of how much damage the player dealt to it. If, in a duo, one player did all the damage to an enemy, both players would receive 50% of the cash the enemy would normally give in solo. This meant that in solo, you received 100% of the cash when an enemy was killed, or it was damaged enough. With each additional player, this is reduced to 50% in duo, 33% in trio and 25% in quad. If it is a decimal, it gets rounded up or down depending on the decimal value. If it is at least 0.5, it gets rounded up. If it is less than 0.5, it gets rounded down.
Health of enemies in this mode scaled with player count and difficulty.
- In Easy, the increase was 5% in duo, 20% in trio and 40% in quad.
- In Hard, the increase was 30% in duo, 60% in trio and 70% in quad.
This map had the Path Spawn Even modifier, which was an indicator of each enemy only appearing on one path. In the hard difficulty, various curses could also be applied, Skills became disabled and the Farm's income was disabled. Base health was set to 100. The final boss of the map was the Null Commander.
Design & Path
Outpost 16 was a research and development headquarters located at the outskirts of Cyber City. It was placed specifically on the side of a cliff, overlooking the city. It was a mostly orange colored facility that housed multiple futuristic buildings, containers and lamps. Near the middle of the map, around 50 God Cube fragments could be seen laying on a platform, which later on began to merge. The outpost was accessed through a road which lead to Cyber City. It ended at a parking lot at Outpost 16.
The map itself went through multiple changes as the waves progress. The God Cube fragments initially laid on the floor and did not start to merge until later. The map started out with an orange sky, which became darker after the first cutscene. The whole outpost also broke apart as waves go on, with some buildings getting completely destroyed.
Three paths started at separate portals, converging very early on and taking a few 90-degree turns before ending at a gate leading to the inside of the research base.
Interactive Map
Curses
In the Hard difficulty, every fifth wave a curse was applied to the match. Curses were modifiers which came with both upsides and downsides. They lasted the entire match and, majority of the time, did not boost the rewards the match gave out. The following curses could be applied:
- Justice, upon reaching 25% of the base health, every tower received a 10% Damage Buff.
- The Fool, set the base health to 1 but also increased all wave bonuses by 10%.
- The Tower, debuffs like stuns now lasted 50% longer when applied to towers, but debuffs like burn now lasted 25% longer when applied to enemies. Additionally, Call to Arms duration was also extended by 10%.
- The Moon, made all enemies Hidden but also gave every tower a 10% Range Buff.
- The Star, applied a 5% Range Debuff and 5% Firerate Debuff (~5.26% increase) to towers, but increased every player's total tower placement limit by 5.
- The Sun, enemies now all spawned with the Stun Immunity, Freeze Immunity and Burn Immunity, but towers now had all three detections.
- The Chariot, all towers received a 10% Firerate Debuff (~11.11% increase), which was replaced with a 10% Firerate Buff and 10% Damage Buff on the final wave.
- Temperance, Mutation was applied which boosted the Shield Health of enemies by 5% of their base health, but gave all towers stun immunity and boosted rewards by 20%.
- Death, all enemies were now Bloated and Nimble, but rewards were increased by 20%.
Preset Loadouts
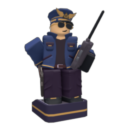
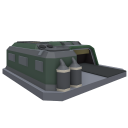
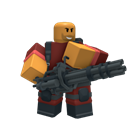
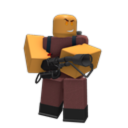
Each player was allowed to pick from one of three preset loadouts in the Easy difficulty. Alongside these preset options, players could opt to use their current loadout as the first choice. However, if one's loadout contained no towers, this option would be unavailable.










Rewards
The game calculated how many 

Rewards are calculated as:
| Coins Reward | EXP Reward |
|---|---|
| Easy | |
| ( |
( |
| Hard | |
| ( |
( |
Triumphing Outpost 16 could give out an additional reward, which could be a crate, consumable or ticket. They were meant to be guaranteed, though due to a bug this did not always happen. These items in the Easy difficulty were:
- Common (55%)


- Low Grade Crate
- Turkey Leg (2-4)
- Pumpkin Bomb (2-4)
- Uncommon (35%)
- Mid Grade Crate
- Sugar Rush (2-4)
- Rare (10%)
- Unholy Storm (2-3)
- Necromancer's Tome (2-3)
- High Grade Crate

In the Hard difficulty, these were:
- Common (50%)
- Low Grade Crate
- Turkey Leg (2-4)
- Pumpkin Bomb (2-4)
- Uncommon (30%)
- Mid Grade Crate
- Sugar Rush (2-3)
- Rare (20%)
- Unholy Storm (2-3)
- Necromancer's Tome (2-3)
- High Grade Crate
Badges/Achievements
There were also a few badges and achievements which could be obtained when playing this map. These are:


Rewards:


Complete all 3 nights on ‘Hard’ to unlock the event tower.
Rewards:
Wave Structure
Outpost 16 had a few wave bonuses which changed based on the difficulty and wave. Between Wave 1 and 14 in Easy, it was:

Between Wave 15 and 19 in Easy, it was:
Between Wave 1 and 14 in Hard, it was:
Between Wave 15 and 19 in Hard, it was:
In both difficulties, Wave 20 gave 
Depending on player count, the wave bonus was reduced using multipliers. These multipliers were:
| Players | Reduction per Player | Total Reduction |
|---|---|---|
| Solo | 0% | 0% |
| Duo | 5% | 10% |
| Trio | 5% | 15% |
| Quad | 10% (Easy) 5% (Hard) |
40% (Easy) 20% (Hard) |
The wave clear bonus appeared when every enemy from that wave was killed and no damage was dealt to the base health. It was 25% of the wave bonus in solo, while for duo, trio and quad it was 20%.
Waves could not be skipped in Outpost 16. The waves in Outpost 16 mode followed these timings:
| Waves | Wave Timer |
|---|---|
| 1-4 | 1:00 |
| 5-13 | 1:15 |
| 14-19 | 1:30 |
| 20 | ∞ |
Bolded names indicate an enemy type's debut.
| Wave | Dialogue | Enemy Type & Amount | |
|---|---|---|---|
| 1 |  |
Urgh! This should work! Maybe if we had the shards from the Children of Exo it'd be more stable! |
8x Nulling, 4x Null Runner |
|
It's too late to stop the merging process, but it should be possible to stabilize it. We just need more time. | ||
 |
Don't worry, we've got you. Commander, focus on organizing the units and protecting the control station. Nothing gets by us. | ||
 |
Yes, Ma'am! | ||
| 2 | - | 11x Null Runner, 6x Nulling, 1x Null Dredge | |
| 3 |  |
I can't believe what I'm seeing. These readings suggest that the shards aren't the corruption itself, but instead the container that prevents it from escaping. |
6x Nulling, 3x Null Dredge |
|
The power inside these shards are condensing as they merge, their physical state is weak enough to allow that energy out. | ||
 |
If this continues, it will corrupt the space around it and tear apart our reality. We can't contain something this powerful! | ||
 |
This is bigger than we thought... | ||
| 4 | - | 6x Null Runner, 9x Nulling (Bloated), 3x Null Dredge | |
| 5 |  |
I knew it! There had to be something out there! I theorized that if portals act as tunnels to other realms, then what kind of space were we tunneling through? |
8x Null Runner, 6x Null Dredge, 1x Null Scout (Boss) |
|
We've named that space the 'Nil Zone'. I never thought a place like that could exist. | ||
 |
What are you trying to say? | ||
|
There could be things stronger than anything we've seen before. It's not a question of what's out there, but who. | ||
| 6 | |
What just happened?! It looks like we've been hit with a curse! |
5x Null Dredge (Bloated), 1x Null Scout |
|
Be careful! Anything could happen while our realm destabilizes! | ||
| 7 |  |
Hey, uhh... Can we talk about why those things look like us? |
2x Null Scout, 12x Null Runner (Bloated), 1x Null Crook Boss |
|
Those Nil Zone creatures may be more sensitive to the corruption than we are. As the energy expands outwards, it might be violently ripping through your bodies and replicating your DNA into them! | ||
 |
Are we--are we are we going to be alright?! | ||
|
Maybe! | ||
| 8 | - | 6x Null Dredge (Bloated), 3x Null Scout | |
| 9 | |
You know, I kind of miss being out in the field. Reminds me of our earlier years. |
9x Lost Glitch |
 |
...Ma'am? | ||
|
You're right; not the time. | ||
| 10 | - | 8x Lost Glitch, 2x Null Scout (Bloated), 1x Null Crook Boss (Bloated, Hidden) | |
| 11 | |
Is that Freezer?! Look what's happened to him! |
2x Null Scout (Bloated), 3x Null Crook Boss, 2x Null Freezer |
 |
Watch out! He's firing at us! | ||
| 12 | - | 3x Lost Glitch (Bloated), 6x Null Dredge (Nimble), 3x Null Freezer | |
| 13 |  |
Those creatures are coming through the rifts! |
5x Lost Glitch (Bloated), 1x Null Scout (Bloated), 2x Null Freezer, 1x Null Beast |
|
Take them out! | ||
| 14 | - | 2x Null Freezer (Bloated), 2x Null Crook Boss (Bloated), 1x Null Beast (Bloated), 2x Null Freezer | |
| 15 | |
ARGH! These guys aren't giving up! V, how much longer? |
3x Null Freezer (Bloated), 2x Null Crook Boss (Hidden), 1x Null Warden (Boss) |
|
We've slowed the merge the best we could, but the shards are so unpredictable that if we mess up something they could explode. If that happens-... | ||
|
No one will survive. | ||
| 16 | - | 15x Lost Glitch (Bloated), 2x Null Beast, 1x Null Warden (Stun Immune, Freeze Immune) | |
| 17 | |
Now they have pyromancers?! |
8x Null Scout (Bloated), 6x Null Crook Boss, 1x Null Warden, 1x Null Beast (Bloated), 2x Null Pyromancer |
 |
What's the difference between our Pyro and those things? | ||
|
He can cook. | ||
| 18 | - | 10x Lost Glitch (Hidden), 10x Null Crook Boss (Bloated), 2x Null Warden, 2x Null Pyromancer | |
| 19 | - | 9x Null Scout (Bloated), 6x Null Freezer (Bloated, Nimble), 2x Null Pyromancer (Bloated), 2x Null Warden, 7x Null Crook Boss (Hidden, Bloated) | |
| 20 | |
Is that... who I think it is? |
18x Lost Glitch (Bloated), 8x Null Crook Boss (Bloated), 6x Null Beast, 6x Null Freezer (Bloated), 2x Null Pyromancer, 1x Null Warden (Stun Immune, Freeze Immune), 1x Null Commander (Boss) |
|
It's...me?! I thought the duck said we'd be fine! | ||
|
I SAID MAYBE! | ||
|
Hey! Shoot that guy! | ||
| Wave | Dialogue | Enemy Type & Amount | |
|---|---|---|---|
| 1 | |
Urgh! This should work! Maybe if we had the shards from the Children of Exo it'd be more stable! |
8x Nulling, 4x Null Runner |
|
It's too late to stop the merging process, but it should be possible to stabilize it. We just need more time. | ||
|
Don't worry, we've got you. Commander, focus on organizing the units and protecting the control station. Nothing gets by us. | ||
|
Yes, Ma'am! | ||
| 2 | - | 11x Null Runner, 6x Nulling, 2x Null Dredge | |
| 3 | |
I can't believe what I'm seeing. These readings suggest that the shards aren't the corruption itself, but instead the container that prevents it from escaping. |
6x Nulling, 6x Null Dredge |
|
The power inside these shards are condensing as they merge, their physical state is weak enough to allow that energy out. | ||
|
If this continues, it will corrupt the space around it and tear apart our reality. We can't contain something this powerful! | ||
|
This is bigger than we thought... | ||
| 4 | - | 8x Null Runner (Nimble), 10x Nulling (Bloated), 5x Null Dredge (Aggro) | |
| 5 | |
I knew it! There had to be something out there! I theorized that if portals act as tunnels to other realms, then what kind of space were we tunneling through? |
12x Null Runner (Bloated), 8x Null Dredge, 1x Null Scout (Boss) |
|
We've named that space the 'Nil Zone'. I never thought a place like that could exist. | ||
|
What are you trying to say? | ||
|
There could be things stronger than anything we've seen before. It's not a question of what's out there, but who. | ||
| 6 | |
What just happened?! It looks like we've been hit with a curse! |
8x Null Dredge (Bloated, Aggro), 1x Null Scout |
|
Be careful! Anything could happen while our realm destabilizes! | ||
| 7 | |
Hey, uhh... Can we talk about why those things look like us? |
4x Null Scout, 12x Null Runner (Bloated), 1x Null Crook Boss |
|
Those Nil Zone creatures may be more sensitive to the corruption than we are. As the energy expands outwards, it might be violently ripping through your bodies and replicating your DNA into them! | ||
|
Are we--are we are we going to be alright?! | ||
|
Maybe! | ||
| 8 | - | 6x Null Dredge (Bloated), 2x Null Scout (Bloated), 1x Null Scout (Bloated, Freeze Immune) | |
| 9 | |
You know, I kind of miss being out in the field. Reminds me of our earlier years. |
10x Lost Glitch |
|
...Ma'am? | ||
|
You're right; not the time. | ||
| 10 | - | 8x Lost Glitch, 1x Null Scout (Bloated), 1x Null Crook Boss (Hidden) 1x Null Crook Boss (Bloated, Hidden) | |
| 11 | |
Is that Freezer?! Look what's happened to him! |
4x Null Scout (Bloated), 4x Null Crook Boss, 2x Null Freezer |
|
Watch out! He's firing at us! | ||
| 12 | - | 6x Lost Glitch (Bloated), 10x Null Dredge (Bloated, Nimble), 2x Null Freezer, 1x Null Freezer (Bloated) | |
| 13 | |
Those creatures are coming through the rifts! |
6x Lost Glitch (Bloated), 2x Null Freezer, 2x Null Beast |
|
Take them out! | ||
| 14 | - | 2x Null Freezer (Bloated), 4x Null Crook Boss (Bloated), 1x Null Beast (Bloated), 2x Null Freezer | |
| 15 | |
ARGH! These guys aren't giving up! V, how much longer? |
3x Null Freezer (Bloated), 2x Null Crook Boss (Hidden), 1x Null Warden (Boss, Lead) |
|
We've slowed the merge the best we could, but the shards are so unpredictable that if we mess up something they could explode. If that happens-... | ||
|
No one will survive. | ||
| 16 | - | 15x Lost Glitch (Bloated), 2x Null Beast, 1x Null Warden (Stun Immune, Freeze Immune, Lead) | |
| 17 | |
Now they have pyromancers?! |
8x Null Scout (Bloated), 6x Null Crook Boss (Bloated), 1x Null Warden (Stun Immune, Freeze Immune, Lead), 1x Null Beast (Bloated), 2x Null Pyromancer |
|
What's the difference between our Pyro and those things? | ||
|
He can cook. | ||
| 18 | - | 10x Lost Glitch (Hidden), 10x Null Crook Boss (Bloated), 2x Null Warden (Freeze Immune, Lead), 2x Null Pyromancer | |
| 19 | - | 9x Null Scout (Bloated), 6x Null Freezer (Bloated, Nimble), 3x Null Pyromancer (Bloated), 3x Null Warden (Freeze Immune, Lead), 7x Null Crook Boss (Hidden, Bloated) | |
| 20 | |
Is that... who I think it is? |
18x Lost Glitch (Bloated), 8x Null Crook Boss (Bloated), 6x Null Beast, 6x Null Freezer (Bloated), 2x Null Pyromancer, 1x Null Pyromancer (Bloated), 1x Null Warden (Bloated, Stun Immune, Freeze Immune, Lead), 1x Null Commander (Boss) |
|
It's...me?! I thought the duck said we'd be fine! | ||
|
I SAID MAYBE! | ||
|
Hey! Shoot that guy! | ||
Strategy
- Due to the gamemode not having many waves, cheaper towers like the Golden Scout, Golden Soldier, Rocketeer should be used.
- The Golden Scout is especially effective, as it does very high DPS for a cheap price while also having lead detection, essentially being able to solo the whole mode by itself.
- Support towers like the Commander and DJ Booth are recommended to beat the mode.
- The Medic will be less useful, since the Null Freezer can freeze your towers, bypassing its shield.
- The Farm should not be used on this map in the Hard difficulty, as its income generation is disabled there.
- This, however, does not apply to the Easy difficulty.
- This map contains curses, which apply a modifier that comes with downsides and upsides.
- Generally, the curses chosen should be appropriate for the player's current loadouts. For example, The Moon should not be chosen if you lack hidden detection.
- The Fool is quite effective as it can boost the wave bonuses by 10% for the minor downside of reducing base health to 1. As most mid to late-game waves will generally result in death when leaking enemies, the downside is practically nonexistent.
- Justice is a safe pick, as at worst it has literally no impact on the match and at best, makes it easier.
- The Tower can be useful if you rely a lot on towers that apply debuffs, like the Electroshocker, Jester, Toxic Gunner or Swarmer. Otherwise, this should not be picked as it has the downside of increased enemy debuff duration.
- The Moon is a great pick if every tower brought has hidden detection or The Sun is active, as that curse's upside completely negates The Moon's downside.
- The Sun is a good pick in cases where you do not use any stun, freeze or burn towers, as it gives all towers every detection.
- The Star can be a decent pick for loadouts which involve placing down one tower multiple times, even more so in higher player counts where players can place down less towers.
- The Chariot is best ignored unless it is either the final wave or the two other options are far worse for your loadout, as it is a negative effect for every wave except the final one.
- Temperance, while it does provide every tower with stun immunity, is not that great of a pick as there are no enemies that stun until the final wave. It is however very useful on the final wave if given, as Mutation there will have no effect, meaning it comes with no downsides.
- Additionally, it gives a 20% reward boost, so if chosen later, it will not make it that much harder and give you extra rewards.
- Death should be avoided as the only positive effect is a 20% reward boost, which is not worth it.
- If you want to beat this night with the Death curse, it is heavily advised to use either the Cowboy or Golden Cowboy, and stall one Null Warden on wave 19 with either the Warden or Archer alongside the DJ Booth's purple track ability so they can make money out of the Null Warden without doing damage to it, allowing you to afford high DPS towers for wave 20, or constantly using the Mercenary Base's Airdrop ability to drop Riot Guards.
- You may have to retry multiple times, as Death is not guaranteed to appear on wave 20 or even throughout the match.
- This also means you cannot pick The Sun beforehand, as this curse gives towers all detections, as well as giving all enemies the Stun Immunity attribute.
- The Tower is heavily recommended, as it increases the debuff duration from towers by 10%.
- If you want to beat this night with the Death curse, it is heavily advised to use either the Cowboy or Golden Cowboy, and stall one Null Warden on wave 19 with either the Warden or Archer alongside the DJ Booth's purple track ability so they can make money out of the Null Warden without doing damage to it, allowing you to afford high DPS towers for wave 20, or constantly using the Mercenary Base's Airdrop ability to drop Riot Guards.
Gallery
Promotional Images
-
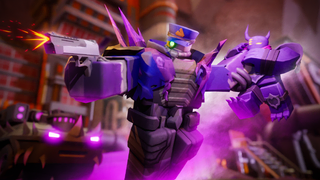 Current version on a promotional image.

Thumbnails
-
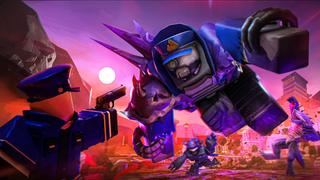 Current version on the game thumbnail.

Icons
-
 Outpost 16 on the game icon.
-
 Outpost 16 on the game icon.
-
 Outpost 16 on the game icon.
-
 Outpost 16 on the game icon.
-
 Outpost 16 on the game icon.
-
 Outpost 16 on the game icon.
-
 Outpost 16 on the game icon.
-
 Outpost 16 on the game icon.
-
 Outpost 16 on the game icon.
-
 Outpost 16 on the game icon.
-
 Outpost 16 on the game icon.
-
 Outpost 16 on the game icon.


Promotional Images
-
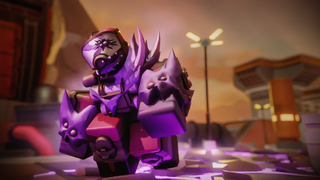 Outpost 16 on a promotional image.
-
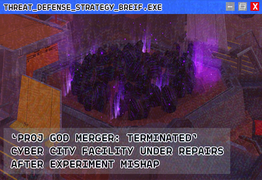 Outpost 16 on a promotional image.


Trailers
-
Outpost 16 on the Null & Void Event trailer.

Cutscenes
-
Outpost 16 in The Narratorium cutscenes.

Renders
-
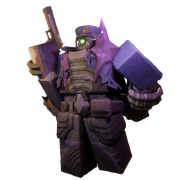 Outpost 16 on the Easy Matchmaking icon.
-
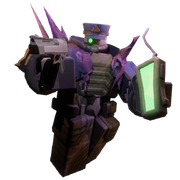 Outpost 16 on the Hard Matchmaking icon.


Miscellaneous
-
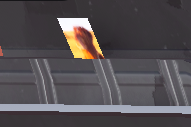 Calm dog on top of the building.


Trivia
- On top of one of the buildings, an image of a Calm Dog could be found.
- One of the buildings had its gate opened, which lead to an underground laboratory.
Update History
- 18 October 2025 - v1.77.0
- Outpost 16 added.
- Bug: Various dialogues use broken animations.
- Bug: Not voting for a curse prevents it from happening.
- 18 October 2025 - v1.77.1
- Hard difficulty

- Hard difficulty
- 23 October 2025 - v1.77.6
- Bugfix: If a curse is not voted for, a random curse is now picked.
- 26 November 2025 - v1.80.1e
- Outpost 16 removed.
| Null & Void Event | ||
|---|---|---|
| Previous Map | Current Map | Next Map |
| N/A Start |
Outpost 16 Night I |
Banlands Night II |


| PVP | ||
|---|---|---|
| Easy | Crash Course • Judging Hall • Laser Stadium • Warm Land | |
| Normal | Desert Oasis • Distant Shapes • Opulent Remains | |
| Sandbox Mode | ||
|---|---|---|
| Hard | Classic Candy Cane Lane • Classic Castle • Classic Forest Camp • Classic Island Chaos • Classic Winter | |
| Insane | Badlands • Rotfield | |
| Special | Dev • Headache Headquarters | |
| Story Exclusive | ||
|---|---|---|
| Easy | Abandoned City | |
| Normal | Severing Connection • Tutorial | |
| Removed | ||
|---|---|---|
| Undefined | Candy Cane Lane • Doomspire • Island Chaos • Subzero • Castle • Mount Amillion • End of the Line • Canyon • Castle Outskirts • Candy Valley • Fungi Forest • Freight Fright • Graveyard • Winter • Robloxia • Ancient Colosseum • Highlands • Voidlands • PVP | |
| Easy | PVP_1 • PVP_2 • PVP_3 • PVP_4 • PVP_5 • PVP_6 • PVP_7 • PVP_8 • PVP_9 • PVP_10 • PVP_11 | |
| Hard | Polluted Wasteland • Nightmare Carnival | |
| Unreleased | ||
|---|---|---|
| Undefined | Backwoods • Battlefront • Castle Outskirts • Dusty Ruins • Fogged Lair • Fraction Zone • Gingerbread Town • Hallows Ville • Mars • Petulance Ground • Pumpkin Patch • PVP_11 • PVP_3 • PVP_6 • PVP_8 • PVP_9 • Unknown Castle Map • Unreleased Halloween 2020 Map • Unreleased Tournament Map • Waste Ground • Weepers Gaol • Winterfall • WIP City | |