
Korblox Temple
Korblox Temple has been removed from the game as of the 24th of March 2025 as it was part of the The Hunt: Mega Edition Event.
This page has been preserved for historical purposes.
Description
Korblox Temple was the event map for The Hunt: Mega Edition Event. Like other event maps, this map had a specialized wave structure with special enemies. Players started with a varying amount of cash, based on how many players there were in the match and the difficulty chosen. Triumphing the Easy difficulty of this map gave the Korblox Soldier skin, while the Mega difficulty also gave the KorbloxHunter Nametag.
In Easy difficulty, you only got cash from them if they were killed in this map, or in some cases, damaged by a specific amount of health. Additionally, the amount gotten was a set amount of cash, which was not always equal to the enemy's health. In solo, you received 100% of the cash when an enemy was killed or damaged enough. With each additional player, this decreaseds by 25%, which meant that in a quad, you only got 25% of the cash. This amount was distributed between players based on how much damage they dealt. However, if a player did not deal any damage, they would receive a percentage of the enemy's full cash upon its death or when it was damaged enough, which was 12.5% in duo, 16.7% in trio and 18.75% in quad. If it iwas a decimal, it got rounded up or down depending on the decimal value. If it was at least 0.5, it got rounded up. If it was less than 0.5, it got rounded down. For example, the Korblox Deathwalker gave 
In Mega and Impossible difficulties, you only got cash if an enemy is killed, or in some cases, damaged by a specific amount of health. Additionally, the amount gained was a set amount of cash, which was not always equal to the enemy's health. It used a slightly different method of distributing cash between players, as enemies split their cash between players, regardless of how much damage the player dealt to it. If, in a duo, one player did all the damage to an enemy, both players would receive 50% of the cash the enemy would normally give in solo. This means that in solo, you received 100% of the cash when an enemy is killed, or it was damaged enough. With each additional player, this was reduced to 50% in duo and 33% in trio. If it was a decimal number, it got rounded up or down depending on the decimal value. If it was at least 0.5, it gets rounded up. If it was less than 0.5, it got rounded down. For example, the Korblox Deathwalker gives
In the Impossible difficulties, there were also a few additional changes to make the match harder. Most noticeably, Mutation was applied, 10% more health every wave after their debut. Additionally, starting from duo, health scaling was applied to enemies. It was 10% in duo and 20% in trio, though the amount of health enemies actually had it increased by varies based on the enemy's health. Consumables and Time Scale were also disabled in all difficulties except Easy.
Mega Token

In order to unlock the Mega difficulty, the player needed to get the previous 19 Mega Tokens first, with the previous game being Regretevator. In the lobby, players needed to interact with the green terminal on the second floor of the Crates area and enter "Redcliff Falls" (not case sensitive) and then press the "SEND" button below, the interface changed with the phrase "[ The Deathwalker awaits... ]" and a green tick appearing below. After beating the Mega difficulty, the player would be awarded with the Mega Token and the KorbloxHunter Nametag.
Design & Path
Korblox Temple took place inside a corrupted temple controlled by the Korblox. It was mostly blue and black. Multiple ghostly trees and stalagmite were scattered around the temple. Multiple small cliffs could also be found on the map. On one side of the map there was a giant entrance to the temple, which was locked. Lightning struck around the entire map.
There was a green path, which slowly got corrupted as the waves go on. It started at a glowing gate and ended at another gate, which lead to the exit from the temple.
Interactive Map
Story
This map takes place a year after The Hunt Event.
After their defeat in Huevous Hunt, the Korblox Empire returns stronger than before. The T.D.S. Organization sends out multiple agents to deal with the returning threat. During the battle, they find out that the Korblox Empire has started working together with the Fallen Kingdom, which has sent out multiple of their units to help out. The T.D.S. Organization eventually reaches the Korblox Deathwalker, who they defeat, leading to the T.D.S. Organization winning the battle.
While this would technically be the third fight, as the second would be The Classic Event, some dialogue in this map does not match what happened in The Classic Event, suggesting that it is not canon or the Korblox there were fake. More specifically, the Commander is shocked to see the Korblox and Fallen working together, when that already happened in Classic Castle. Additionally, the leaders of the Korblox are different, in Korblox Temple that being the Archlord, when 1x1x1x1 was their leader in The Classic Event.
Preset Loadouts
Loadouts could be selected in both Easy and Mega difficulties. Alongside these preset options, players on Easy difficulty could opt to use the player's current loadout as the first choice. However, if one's loadout contained no towers, this option would be unavailable. Mega used to have its own set of loadouts, though they were replaced with Easy difficulty loadouts on the 24th of March 2025.
Easy & Mega


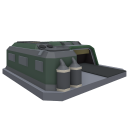

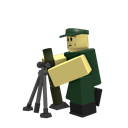



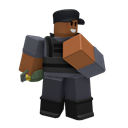
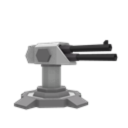





Original Mega









Rewards
The game calculated how many 

Rewards are calculated as:
| Coins Reward | EXP Reward |
|---|---|
| Easy Rewards | |
|
|
| Mega Rewards | |
|
|
| Impossible Rewards | |
| ( |
( |
| Original Mega Rewards | |
| ( |
( |
Triumphing Korblox Temple could give out an additional reward. In Easy difficulty, these items were:
- Common (50%)
- Grenade (1-2)
- Flash Bang (1-2)
- Molotov (1-2)
- Uncommon (30%)


- Rare (20%)
- Low Grade Crate

- Barricade
- Supply Drop
- AirStrike


In Mega and Impossible difficulties, these items were:
- Common (47.39%)
- Low Grade Crate
- Barricade (2-4)
- Supply Drop (2-4)
- Uncommon (28.44%)
- Cooldown Flag (2-4)
- Range Flag (2-4)
- Damage Flag (2-4)
- Mid Grade Crate
- Rare (18.96%)
- High Grade Crate
- Napalm Strike (2-3)
- Blizzard Bomb (2-3)
- Legendary (4.74%)
- Custom (0.47%)
Triumphing this map on the Easy difficulty also gave the Korblox skin for the Soldier and a standard token. Triumphing this map on the Mega difficulty also gave the KorbloxHunter Nametag and a Mega Token. There were no additional rewards for the Impossible difficulty.
Badges
There were also a few badges which could be obtained when playing this map, which may have had additional rewards alongside the badge. These were:

Rewards:
Standard Token & Korblox Soldier


Rewards:
Mega Token & KorbloxHunter Nametag

Wave Structure
The formula for calculating wave bonus on each wave in Easy and Mega was:

The formula for calculating wave bonus on each wave in Impossible was:
Depending on player count, the wave bonus was reduced using multipliers. These multipliers were:
| Players | Reduction per Player | Total Reduction |
|---|---|---|
| Solo | 0% | 0% |
| Duo | 5% (Easy & Mega) 10% (Impossible) |
10% (Easy & Mega) 20% (Impossible) |
| Trio | 5% (Easy & Mega) 10% (Impossible) |
15% (Easy & Mega) 30% (Impossible) |
The wave clear bonus appeared when every enemy from that wave was killed. In the Easy and Mega difficulty, it was 35% of the wave bonus in solo, while for duo and trio it was 20%. In the Impossible difficulty, it was 35% of the wave bonus in solo, while for duo and trio it iwas 15%.
The waves in Korblox Temple could not be skipped. They followed these timings:
| Waves | Easy/Mega | Impossible | ||
|---|---|---|---|---|
| Wave Timer | Skip Time[1] | Wave Timer | Skip Time[1] | |
| 1 | 1:00 | 0:19[2] | 1:00 | 0:19[2] |
| 2 | 1:00 | 0:19[2] | 1:10 | 0:19[3] |
| 3 | 1:10 | 0:19[3] | 1:10 | 0:19[3] |
| 4 | 1:15 | 0:19[4] | 1:15 | 0:19[4] |
| 5-6 | 1:20 | 0:19[5] | 1:25 | 0:19[6] |
| 7-10 | 1:20 | 0:19[5] | 1:30 | 0:19[7] |
| 11-12 | 1:20 | 0:19[5] | 1:35 | 0:19[8] |
| 13 | 1:20 | 0:19[5] | 1:50 | 0:19[9] |
| 14 | 1:30 | 0:19[7] | 1:50 | 0:19[9] |
| 15 | ∞ | N/A | 1:40 | 0:19[10] |
| 16-17 | - | 1:50 | 0:19[9] | |
| 18 | - | 2:00 | 0:19[11] | |
| 19 | - | 2:30 | 0:19[12] | |
| 20 | - | ∞ | N/A | |
Bolded names indicates an enemy type's debut.
| Wave | Commander Dialogue | Enemy Type & Amount | |
|---|---|---|---|
| 1 |  |
I guess the Korblox Empire didn't learn from last year. We've received reports that they're back and stronger than ever. |
4x Korblox Seeker, 2x Korblox Guard |
 |
I have to say, it looks like they've renovated the place! | ||
|
We're in their territory now, so I recommend upgrading the towers for some Hidden detection. | ||
| 2 | - | 2x Korblox Undead, 4x Korblox Guard, 8x Korblox Seeker | |
| 3 |  |
Brace yourself! They're much more aggressive than last time! |
3x Korblox Undead, 4x Korblox Guard, 6x Korblox Seeker, 3x Korblox Undead, 6x Korblox Seeker, 7x Korblox Guard, 1x Korblox Soul |
 |
Luckily, we've come prepared. | ||
| 4 |  |
Look out! The Korblox Warriors have returned! |
2x Korblox Undead (Bloated), 1x Korblox Warrior, 8x Korblox Seeker (Bloated), 5x Korblox Guard, 4x Korblox Soul |
|
Man they're tough! We'll need to bring out the big guns! | ||
| 5 | - | 2x Korblox Warrior, 7x Korblox Guard (Bloated), 10x Korblox Seeker (Bloated), 8x Korblox Soul, 5x Korblox Undead (Bloated), 1x Korblox Warrior | |
| 6 | |
These Redcliff Traitors never cease to amaze me. |
10x Korblox Guard (Nimble), 10x Korblox Soul, 1x Redcliff Traitor, 10x Korblox Undead (Bloated), 15x Korblox Seeker (Bloated, Nimble), 4x Korblox Warrior |
|
Let's give these things what they deserve! | ||
| 7 | |
Wait a minute... are those Fallen?! |
1x Redcliff Traitor, 2x Korblox Warrior (Bloated), 12x Korblox Soul, 20x Korblox Guard (Bloated, Nimble), 4x Fallen |
|
When did they team up with the Korblox Empire?! | ||
| 8 | - | 5x Fallen, 1x Redcliff Traitor, 15x Korblox Undead (Bloated, Nimble), 10x Korblox Soul (Bloated, Nimble), 1x Redcliff Traitor, 1x Korblox Warrior, 1x Redcliff Traitor, 1x Korblox General | |
| 9 | |
It looks like a Fallen Necromancer is apart[sic] of the Korblox Empire now. |
1x Redcliff Traitor, 5x Fallen, 1x Redcliff Traitor, 2x Korblox Warrior, 5x Fallen, 2x Korblox Warrior, 1x Korblox General (Stun Immune, Freeze Immune), 1x Fallen Necromancer (Bloated) |
|
Be on your guard--I can bet that there's more to their strategy than what we can see. | ||
| 10 | - | 2x Redcliff Traitor, 8x Fallen, 3x Korblox Warrior, 2x Korblox General, 2x Fallen Necromancer, 10x Korblox Soul (Bloated), 15x Korblox Guard (Bloated) | |
| 11 | |
It's terrifying how well the Fallen and Korblox Empire can work together. |
1x Korblox General (Bloated), 7x Fallen (Bloated), 1x Fallen Necromancer (Bloated), 3x Korblox Warrior (Bloated), 7x Fallen (Bloated), 1x Fallen Necromancer (Bloated), 15 Korblox Soul (Bloated, Nimble) |
|
Just how long have they been planning this attack? | ||
| 12 | - | 3x Redcliff Traitor (Bloated), 5x Fallen, 5x Korblox Warrior (Bloated), 3x Redcliff Traitor (Bloated), 5x Fallen, 5x Korblox Warrior (Bloated) | |
| 13 | |
Keep your eyes peeled! I doubt we're through the worst of it. |
3x Redcliff Traitor (Bloated), 1x Korblox General (Bloated), 3x Korblox Warrior (Bloated), 3x Redcliff Traitor (Bloated), 1x Korblox General (Bloated), 3x Korblox Warrior (Bloated), 3x Fallen Necromancer (Bloated), 15x Korblox Undead (Bloated, Nimble), 5x Fallen (Bloated) |
|
I can't shake the feeling that something's watching us! Whatever it is, prepare for the worst! | ||
| 14 | - | 2x Redcliff Traitor (Bloated, Corpse), 5x Fallen (Corpse), 25x Korblox Soul (Bloated, Nimble), 2x Korblox General (Bloated, Nimble, Freeze Immune), 4x Korblox Warrior (Bloated), 2x Fallen Necromancer (Bloated), 2x Korblox General (Bloated, Nimble, Freeze Immune), 4x Korblox Warrior (Bloated), 2x Fallen Necromancer (Bloated), 10x Fallen | |
| 15 | |
The Deathwalker? They've finally returned! |
1x Redcliff Traitor (Bloated, Nimble), 5x Fallen (Bloated, Nimble), 1x Redcliff Traitor (Bloated, Nimble), 5x Fallen (Bloated, Nimble), 2x Korblox General (Bloated), 4x Korblox Warrior (Bloated, Nimble), 1x Redcliff Traitor (Bloated, Nimble), 2x Fallen Necromancer (Bloated), 1x Korblox Deathwalker, 2x Fallen Necromancer (Bloated), 20x Korblox Undead (Bloated, Nimble) |
|
It's all or nothing. Let's end this! | ||
| Lose Dialogue | |||
   |
One icon and dialogue is randomly chosen upon defeat:
•We're toast! | ||
| Wave | Commander Dialogue | Enemy Type & Amount | |
|---|---|---|---|
| 1 | |
The Korblox Empire won't give up! I guess the Archlord must want revenge after losing to us last year. |
4x Korblox Seeker, 2x Korblox Guard |
|
I have to say, it looks like they've renovated the place! | ||
|
We're in their territory now, so I recommend upgrading the towers for some Hidden detection. | ||
| 2 | - | 2x Korblox Undead, 4x Korblox Guard, 8x Korblox Seeker | |
| 3 | |
Brace yourself! They're much more aggressive than last time! |
3x Korblox Undead, 4x Korblox Guard, 6x Korblox Seeker, 3x Korblox Undead, 6x Korblox Seeker, 7x Korblox Guard, 1x Korblox Soul |
|
Luckily, we've come prepared. | ||
| 4 | |
Look out! The Korblox Warriors have returned! |
2x Korblox Undead (Bloated), 1x Korblox Warrior, 8x Korblox Seeker (Bloated), 5x Korblox Guard, 4x Korblox Soul |
|
Man they're tough! We'll need to bring out the big guns! | ||
| 5 | - | 2x Korblox Warrior, 7x Korblox Guard (Bloated), 10x Korblox Seeker (Bloated), 8x Korblox Soul, 5x Korblox Undead (Bloated), 1x Korblox Warrior | |
| 6 | |
These Redcliff Traitors never cease to amaze me. |
10x Korblox Guard (Nimble), 10x Korblox Soul, 1x Redcliff Traitor, 10x Korblox Undead (Bloated), 15x Korblox Seeker (Bloated, Nimble), 4x Korblox Warrior |
|
Let's give these things what they deserve! | ||
| 7 | |
Wait a minute... are those Fallen?! |
1x Redcliff Traitor, 2x Korblox Warrior (Bloated), 12x Korblox Soul, 20x Korblox Guard (Bloated, Nimble), 4x Fallen |
|
When did they team up with the Korblox Empire?! | ||
| 8 | - | 5x Fallen, 1x Redcliff Traitor, 15x Korblox Undead (Bloated, Nimble), 10x Korblox Soul (Bloated, Nimble), 1x Redcliff Traitor, 1x Korblox Warrior, 1x Redcliff Traitor, 1x Korblox General | |
| 9 | |
It looks like a Fallen Necromancer is apart[sic] of the Korblox Empire now. |
1x Redcliff Traitor, 5x Fallen, 1x Redcliff Traitor, 2x Korblox Warrior, 5x Fallen, 2x Korblox Warrior, 1x Korblox General (Stun Immune, Freeze Immune), 1x Fallen Necromancer (Bloated) |
|
Be on your guard--I can bet that there's more to their strategy than what we can see. | ||
| 10 | - | 2x Redcliff Traitor, 8x Fallen, 3x Korblox Warrior, 2x Korblox General, 2x Fallen Necromancer, 10x Korblox Soul (Bloated), 15x Korblox Guard (Bloated) | |
| 11 | |
It's terrifying how well the Fallen and Korblox Empire can work together. |
1x Korblox General (Bloated), 7x Fallen (Bloated), 1x Fallen Necromancer (Bloated), 3x Korblox Warrior (Bloated), 7x Fallen (Bloated), 1x Fallen Necromancer (Bloated), 15x Korblox Soul (Bloated, Nimble) |
|
Just how long have they been planning this attack? | ||
| 12 | - | 3x Redcliff Traitor (Bloated), 5x Fallen, 5x Korblox Warrior (Bloated), 3x Redcliff Traitor (Bloated), 5x Fallen, 5x Korblox Warrior (Bloated) | |
| 13 | |
Keep your eyes peeled! I doubt we're through the worst of it. |
3x Redcliff Traitor (Bloated), 1x Korblox General (Bloated), 3x Korblox Warrior (Bloated), 3x Redcliff Traitor (Bloated), 1x Korblox General (Bloated), 3x Korblox Warrior (Bloated), 3x Fallen Necromancer (Bloated), 15x Korblox Undead (Bloated, Nimble), 5x Fallen (Bloated) |
|
I can't shake the feeling that something's watching us! Whatever it is, prepare for the worst! | ||
| 14 | - | 2x Redcliff Traitor (Bloated, Corpse), 5x Fallen (Corpse), 25x Korblox Soul (Bloated, Nimble), 2x Korblox General (Bloated, Nimble, Freeze Immune), 4x Korblox Warrior (Bloated), 2x Fallen Necromancer (Bloated), 2x Korblox General (Bloated, Nimble, Freeze Immune), 4x Korblox Warrior (Bloated), 2x Fallen Necromancer (Bloated), 10x Fallen | |
| 15 | |
The Deathwalker? They've finally returned! |
1x Redcliff Traitor (Bloated, Nimble), 5x Fallen (Bloated, Nimble), 1x Redcliff Traitor (Bloated, Nimble), 5x Fallen (Bloated, Nimble), 2x Korblox General (Bloated), 4x Korblox Warrior (Bloated, Nimble), 1x Redcliff Traitor (Bloated, Nimble), 2x Fallen Necromancer (Bloated), 1x Korblox Deathwalker, 2x Fallen Necromancer (Bloated), 20x Korblox Undead (Bloated, Nimble) |
|
It's all or nothing. Let's end this! | ||
| Lose Dialogue | |||
|
One icon and dialogue is randomly chosen upon defeat:
•We're toast! | ||
Strategy
Easy/Mega
- Early game towers with hidden detection, like the Archer, Medic, Militant, Brawler or Shotgunner, can be useful at dealing with enemies that appear early on and, in some cases, even being able to deal with all the enemies on their own in some cases.
- Due to the high amount of cash given here, high cost DPS towers like the Turret, Ranger, Pursuit or Accelerator can be used here, though as the map itself is not particularly difficult on the Easy difficulty, this they are not necessary to beat the map.
Impossible
- Towers like the Electroshocker, Mortar, Rocketeer, Trapper or Golden Crook Boss are ideal for the earlier waves.
- Towers with splash damage capabilities are especially useful, due to the high amounts of enemies that spawn.
- High DPS towers, like the Ranger, Pursuit, Minigunner or Golden Minigunner, are very useful here.
- High DPS towers that are immune to stuns, such as the Ranger or Pursuit can be especially useful, as that makes them immune to stuns from the Fallen Honor Guard and Korblox Deathwalker.
Gallery
Thumbnails
-
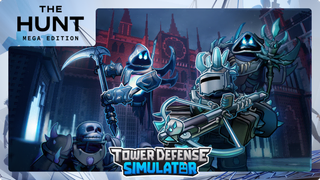 Korblox Temple on the game thumbnail.

Promotional Images
-
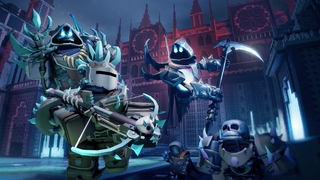 Korblox Temple on a promotional image.

Promotional Videos
-
Korblox Temple on a promotional video.

Renders
-
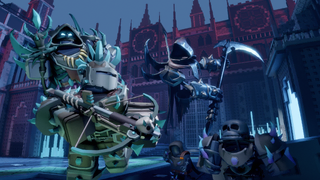 Korblox Temple on a render.


Trivia
- There was a driveable car on this map, which was initially broken down at the beginning.
Update History
- 13 March 2025 - v1.57.7
- Korblox Temple added.
- 14 March 2025 - v1.57.8a
- Impossible difficulty is now available.
- 22 March 2025 - v1.57.11a
- Mega difficulty is now available.
- Bug: Mega difficulty can be accessed by people who have not completed the previous Mega Tokens.
- 22 March 2025 - v1.57.12
- Bugfix: Mega difficulty can now only be played if every player in a party has the previous Mega Tokens.
- 24 March 2025 - v1.57.12a
- Wave structure changed for Mega difficulty.
- Wave bonus is now the same as Easy in the Mega difficulty.
- Starting cash changed.
- Solo decreased from
- Duo decreased from
- Trio decreased from
- Solo decreased from
- Loadouts updated in the Mega difficulty, now they are identical to Easy, though without the choice of using the current loadout.
- Mutation removed from Mega difficulty.
- 24 March 2025 - v1.57.12b
- Korblox Temple removed.
Notes
- ↑ 1.0 1.1 How long you have to wait before you can skip.
- ↑ 2.0 2.1 2.2 Skip at 0:40.
- ↑ 3.0 3.1 3.2 Skip at 0:50.
- ↑ 4.0 4.1 Skip at 0:55.
- ↑ 5.0 5.1 5.2 5.3 Skip at 1:00.
- ↑ Skip at 1:05.
- ↑ 7.0 7.1 Skip at 1:10.
- ↑ Skip at 1:15.
- ↑ 9.0 9.1 9.2 Skip at 1:30.
- ↑ Skip at 1:20.
- ↑ Skip at 1:40.
- ↑ Skip at 2:10.


| PVP | ||
|---|---|---|
| Easy | Crash Course • Judging Hall • Laser Stadium • Warm Land | |
| Normal | Desert Oasis • Distant Shapes • Opulent Remains | |
| Sandbox Mode | ||
|---|---|---|
| Hard | Classic Candy Cane Lane • Classic Castle • Classic Forest Camp • Classic Island Chaos • Classic Winter | |
| Insane | Badlands • Rotfield | |
| Special | Dev • Headache Headquarters | |
| Story Exclusive | ||
|---|---|---|
| Easy | Abandoned City | |
| Normal | Severing Connection • Tutorial | |
| Removed | ||
|---|---|---|
| Undefined | Candy Cane Lane • Doomspire • Island Chaos • Subzero • Castle • Mount Amillion • End of the Line • Canyon • Castle Outskirts • Candy Valley • Fungi Forest • Freight Fright • Graveyard • Winter • Robloxia • Ancient Colosseum • Highlands • Voidlands • PVP | |
| Easy | PVP_1 • PVP_2 • PVP_3 • PVP_4 • PVP_5 • PVP_6 • PVP_7 • PVP_8 • PVP_9 • PVP_10 • PVP_11 | |
| Hard | Polluted Wasteland • Nightmare Carnival | |
| Unreleased | ||
|---|---|---|
| Undefined | Backwoods • Battlefront • Castle Outskirts • Dusty Ruins • Fogged Lair • Fraction Zone • Gingerbread Town • Hallows Ville • Mars • Petulance Ground • Pumpkin Patch • PVP_11 • PVP_3 • PVP_6 • PVP_8 • PVP_9 • Unknown Castle Map • Unreleased Halloween 2020 Map • Unreleased Tournament Map • Waste Ground • Weepers Gaol • Winterfall • WIP City | |