
The Nightmare Realm
The Nightmare Realm has been removed from the game as of the 20th of November 2024 as it was part of the Hexscape Event.
This page has been preserved for historical purposes.
Description
The Nightmare Realm was the event map for the second night of the Hexscape Event. Like other event maps, this map had a specialized wave structure with special enemies. Players started with a varying amount of cash, based on how many players there were in the match. The rewards you receive were based on how many waves you survived and if you won a match. This map had two difficulties, Easy and Hard.
Cash was only gained if an enemy was killed, or in some cases, damaged by a specific amount of health. Additionally, the amount gained was a set amount of cash, which was not always equal to the enemy's health. In solo, you received 100% of the cash when an enemy was killed, or it was damaged enough. With each additional player, this decreased by 25%, which meant that in a trio, you only got 50% of the cash. This amount was distributed between players based on how much damage they dealt. However, if a player did not deal any damage, they would receive a percentage of the enemy's full cash upon its death or when it was damaged enough, which was 12.5% in duo and 16.7% in trio. If it was a decimal, it got rounded up or down depending on the decimal value. If it was at least 0.5, it got rounded up. If it was less than 0.5, it got rounded down. For example, the Conserver gave 
Health of enemies in this mode scaled with player count. The increase was 5% for each player, starting from two players, with an added set amount of health added on top of that increase. The first increase was not always the same amount, while the second increase had a varied amount it increases health by. Both increases were affected by enemy health.
This map had the HP Locked modifier, which set the base health to 100, the Blood modifier, which made enemies drop blood when killed and the Farm Banned modifier, which made Farms not generate cash, though this effect was on the map before, it was just not displayed visually along with other modifiers.
The final boss of this map was the Conserver, though the Rotting Terror, Conjurer and Hex's Maw spawned with the Boss attribute for their first appearance.
Design & Path
The Nightmare Realm was located in a different world, which resembled some form of underworld. It had a red atmosphere with violent black winds. This world had a bleak red landscape, with a large black castle near the path and additional structures in the distance. Multiple spikes were also around the structures. There were also multiple rocks placed around the map. On one side of the map, a large black portal with orange outlines could be seen. On the other, a broken Super Computer could be seen, with multiple Super Computer Parts placed around it. These parts could be fixed, which moves them to the Super Computer.
The path started from a portal, which emitted electrical particles and had swirling winds around it, the path turned and looped around itself once before reaching the Super Computer.
Interactive Map
Objective
When starting the match, players would be notified of an objective that told them to "Rebuild Super Computer". This was done by buying Super Computer Parts, interactables with varying costs that completed a structure at the map exit. If this was not done by Wave 20, the Conserver would spawn with massively increased health. However, this did not mean that a match was lost. If the Conserver was beaten, it still resulted in a triumph. This only made it significantly harder to triumph.
Preset Loadouts
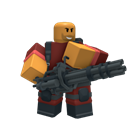
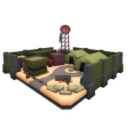
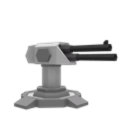
In the Easy difficulty, there were three preset loadouts: Field Commander, Enforcer and Big Spender. If not chosen after 30 seconds, the loadout chosen would be randomized.












Rewards
The game calculated how many 

Rewards are calculated as:
| Coins Reward | EXP Reward |
|---|---|
| Easy | |
|
|
| Hard | |
|
|
Triumphing The Nightmare Realm could give out an additional reward, which could be any of the Hexscape Event consumables. These items were:
- Common (60%)
- Turkey Leg
- Easy: 1-3
- Hard: 1-4
- Pumpkin Bomb
- Easy: 1-2
- Hard: 1-3
- Turkey Leg
- Uncommon (40%)
- Sugar Rush
- Easy: 1-2
- Hard: 1-3
- Sugar Rush
Badges
There were also a few badges which could be obtained when playing this map. These were:


Wave Structure
The Nightmare Realm had two wave bonuses, based on the difficulty. In Easy, the wave bonus was calculated as:
- From Waves 1–15:

- From Waves 16–19:
In Hard, the wave bonus is calculated as:
- From Waves 1–15:
- From Waves 16–19:
Regardless of difficulty, Wave 20 gave
Depending on player count, the wave bonus was reduced using multipliers. These multipliers were:
| Players | Reduction per Player | Total Reduction |
|---|---|---|
| Solo | 0% | 0% |
| Duo | 5% (Easy) 2% (Hard) |
10% (Easy) 4% (Hard) |
| Trio | 1% | 3% |
For example, on Wave 2 when difficulty was set to Hard, the wave bonus was
Waves could not be skipped in The Nightmare Realm. The waves in The Nightmare Realm mode followed these timings:
| Waves | Wave Timer |
|---|---|
| 1-3 | 0:20 |
| 4 | 0:55 |
| 5-7 | 1:00 |
| 8 | ∞ |
| 9-10 | 1:00 |
| 11 | 1:10 |
| 12 | ∞ |
| 13-15 | 1:10 |
| 16 | ∞ |
| 17-19 | 1:20 |
| 19 (Hard) | 1:35 |
| 20 | ∞ |
Bolded names indicate an enemy type's debut.


Strategy
- The area around the loop that this map has is a great spot for towers, as it allows them to cover a large amount of the path and is close to multiple cliff spots.
- The Farm should not be used here, as it does not generate any cash.
- Multiple Tank can appear on this map on the Hard difficulty.
- Collision damage from unit collisions and the Trapper's traps can eliminate them quite easily.
- Towers with a fast firerate, such as the Golden Soldier, Engineer or Minigunner can also be pretty effective.
- The Gatling Gun is quite useful as it can damage multiple enemies while also dealing large amount of damage, make sure to line it up on a straight path so that it can fully utilize its pierce ability.
Gallery
Icons
-
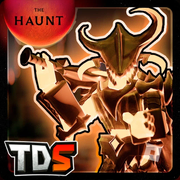 The Nightmare Realm on the game icon.

Thumbnails
-
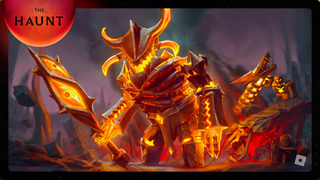 The Nightmare Realm on the game thumbnail.

Renders
-
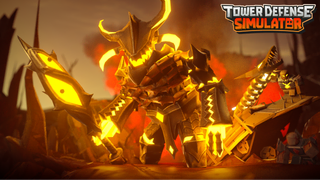 The Nightmare Realm on a render.

Badges
-
 The Nightmare Realm on the Night II Easy Badge.
-
 The Nightmare Realm on the Night II Badge.
Miscellaneous
-
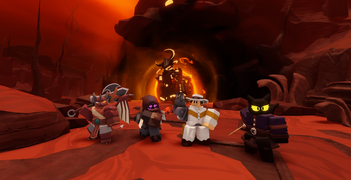 The Nightmare Realm in a v2.11.0 update log image.


Update History
- 25 October 2024 - v1.38.0
- The Nightmare Realm added.
- Bug: Restarting does not bring back computer parts.
- Bug: Restarting in the Easy difficulty allows the player to get the loadout they had equipped instead of the preset one.
- 25 October 2024 - v1.38.2
- Bugfix: Restarting now brings back computer parts.
- 25 October 2024 - v1.38.3
- Farm Banned modifier added.
- 28 October 2024 - v1.38.4
- Super Computer Parts are now highlighted, starting from the cheapest to the most expensive.
- Bug: Lighting is darker, with the red tint also being removed.
- 29 October 2024 - v1.38.4a
- Bugfix: Lighting is now correct.
- 30 October 2024 - v1.38.5
- Bugfix: Restarting on Easy no longer allows players to use their loadout instead of one of the presets.
- 20 November 2024 - v1.42.0
- The Nightmare Realm removed.
Notes
| Hexscape Event | ||
|---|---|---|
| Previous Map | Current Map | Next Map |
| Failed Gateway Night I |
The Nightmare Realm Night II |
Containment Night III |


| PVP | ||
|---|---|---|
| Easy | Crash Course • Judging Hall • Laser Stadium • Warm Land | |
| Normal | Desert Oasis • Distant Shapes • Opulent Remains | |
| Sandbox Mode | ||
|---|---|---|
| Hard | Classic Candy Cane Lane • Classic Castle • Classic Forest Camp • Classic Island Chaos • Classic Winter | |
| Insane | Badlands • Rotfield | |
| Special | Dev • Headache Headquarters | |
| Story Exclusive | ||
|---|---|---|
| Easy | Abandoned City | |
| Normal | Severing Connection • Tutorial | |
| Removed | ||
|---|---|---|
| Undefined | Candy Cane Lane • Doomspire • Island Chaos • Subzero • Castle • Mount Amillion • End of the Line • Canyon • Castle Outskirts • Candy Valley • Fungi Forest • Freight Fright • Graveyard • Winter • Robloxia • Ancient Colosseum • Highlands • Voidlands • PVP | |
| Easy | PVP_1 • PVP_2 • PVP_3 • PVP_4 • PVP_5 • PVP_6 • PVP_7 • PVP_8 • PVP_9 • PVP_10 • PVP_11 | |
| Hard | Polluted Wasteland • Nightmare Carnival | |
| Unreleased | ||
|---|---|---|
| Undefined | Backwoods • Battlefront • Castle Outskirts • Dusty Ruins • Fogged Lair • Fraction Zone • Gingerbread Town • Hallows Ville • Mars • Petulance Ground • Pumpkin Patch • PVP_11 • PVP_3 • PVP_6 • PVP_8 • PVP_9 • Unknown Castle Map • Unreleased Halloween 2020 Map • Unreleased Tournament Map • Waste Ground • Weepers Gaol • Winterfall • WIP City | |