
Mason Arch
Description
Mason Arch is a dawn map that takes place on masonry viaducts with a steel bridge connecting two ends of the viaduct.
Mason Arch has the All Paths modifier, which duplicates most enemies that spawn. It increases all currency rewards by 10%.
Design & Paths
Mason Arch consists of two parallel railway tracks on a brick viaduct. The railway is situated in a hilly valley with trees, and crosses a river. Near the entrance of the tunnels, there are twin bore tunnels into the side of a hill. Right after the tunnels, there are maintenance bridges that span the gap between the parallel viaducts. Several emergency waiting points can be seen in between the gaps of the viaducts. Immediately after the tunnel, there are two station platforms, with a train indicator and abandoned shelves to place cliff towers on. This elevated station platforms are connected to the ground by a spiral staircase. The railway then crosses the bridge on a rusted steel bridge, with two light rail trains running on the bridge, where cliff towers can be placed upon. After, the viaduct briefly continues before entering another twin bore tunnel.
The two paths starts and ends at the twin bore tunnel. The paths are fairly straight, save for the crossing of one of the maintenance bridges and the crossing of the paths on the steel bridge.
Interactive Map
Rewards
The game calculates how many 

Any rewards that end in a decimal point is rounded down, no matter the first figure of the leading decimal.
| Difficulty reward scaling for survival mode Coins and Exp is 1.5x. | ||
|---|---|---|
| Mode | Coins/Gem Reward | EXP Reward |
| Easy | ( |
( |
| Casual | ( |
( |
| Intermediate | ( |
( |
| Molten | ( |
( |
| Fallen | ( |
( |
| Hidden Wave |  |
|
| Frost | ( ( |
( |
Strategy
- All enemies, except the major boss spawn twice on this map due to the All Paths modifier.
- Because of this, you may want to consider using towers that can do AOE damage, such as the Mortar.
- The Rocketeer should not be used as has a dead zone range, whilst the ground space is quite limited.
- The increased amount of enemies allows you to gain more cash by damaging enemies.
- The Cowboy and Golden Cowboy can also generate more cash because of this.
- Because of this, you may want to consider using towers that can do AOE damage, such as the Mortar.
- There are multiple intersections where both paths cross. It is recommended to place your towers at the intersections near the entrances or the intersection near the trains.
- Cliff space is quite limited towards the start of this map, therefore bringing cliff towers may not be a great option.
- The trains in the central portion of the map can be where most of your cliff towers can be placed, and they will be in a great spot to be boosted by support towers, like the Commander.
Gallery
Promotional Videos
-
Current version on a promotional video.
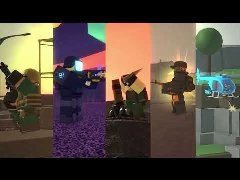
Trailers
-
Current version in the game trailer.

Development Images
-
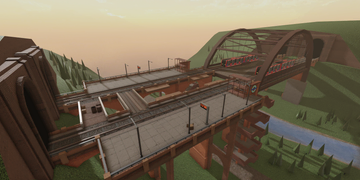 Mason Arch on a development image.
-
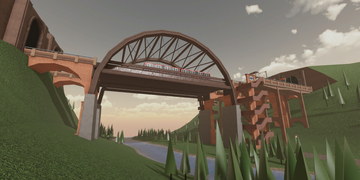 Mason Arch on a development image.


Development Images
-
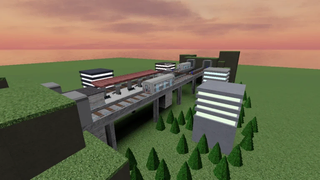 Mason Arch before being remade by Your_Adversary.
-
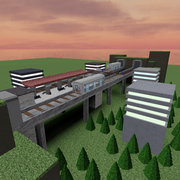 Mason Arch's icon before being remade by Your_Adversary.


Trivia
- Mason Arch was named after Marble Arch tube station in London.
- However, that tube station is situated underground, while this map is entirely based above ground.
- The setting is based on a combination of the Welland Viaduct on the Oakham–Kettering line in East Midlands, England, and Monkwearmouth Railway Bridge in Wearside, England.
- The elevated platforms are based on Mill Hill East tube station in London.
- Incidentally, this arrangement of platforms is similar to St Peter's Metro station in Sunderland, England, the station before the Monkwearmouth Railway Bridge.
- The system that calls at this station, the Tyne and Wear Metro, is also a light rail system, the same as the railway system that this map depicts.
- Incidentally, this arrangement of platforms is similar to St Peter's Metro station in Sunderland, England, the station before the Monkwearmouth Railway Bridge.
- The two trains that are seen on this map are based on Docklands Light Railway B07 stock.
- Furthermore, the turquoise roundel that is used for the Docklands Light Railway can be seen on the platforms of this map.
- At the bottom of the elevated platforms, a British Rail Double Arrow sign can be seen, indicating that the station name is Southgate.
- This is based on Southgate tube station in London, though National Rail trains do not run here in real life.
- It is also named after the former England football team manager, Gareth Southgate.
- On one of the spiral staircases, three trophies can be seen.
- These are the UEFA Champions League Trophy, UEFA Super Cup Trophy and the Euros Trophy (Women's) in the Roblox catalog.
- Mason Arch used to appear in the special Elevators, though this is no longer the case due to them being removed from the game.
- It appeared in both regular and special Elevators.
- As Mason Arch never received its own Matchmaking statue like other special maps and is quite similar to other maps that were not considered special, like the Black Spot Exchange, it is no longer considered a special map.
- The previous incarnation of this map is called Viaduct.
Update History
- 31 October 2022 - v1.4.2
- Mason Arch added.
- 5 June 2026 - v2.0.0
- Enemies Beta removed.


| PVP | ||
|---|---|---|
| Easy | Crash Course • Judging Hall • Laser Stadium • Warm Land | |
| Normal | Desert Oasis • Distant Shapes • Opulent Remains | |
| Sandbox Mode | ||
|---|---|---|
| Hard | Classic Candy Cane Lane • Classic Castle • Classic Forest Camp • Classic Island Chaos • Classic Winter | |
| Insane | Badlands • Rotfield | |
| Special | Dev • Headache Headquarters | |
| Story Exclusive | ||
|---|---|---|
| Easy | Abandoned City | |
| Normal | Severing Connection • Tutorial | |
| Removed | ||
|---|---|---|
| Undefined | Candy Cane Lane • Doomspire • Island Chaos • Subzero • Castle • Mount Amillion • End of the Line • Canyon • Castle Outskirts • Candy Valley • Fungi Forest • Freight Fright • Graveyard • Winter • Robloxia • Ancient Colosseum • Highlands • Voidlands • PVP | |
| Easy | PVP_1 • PVP_2 • PVP_3 • PVP_4 • PVP_5 • PVP_6 • PVP_7 • PVP_8 • PVP_9 • PVP_10 • PVP_11 | |
| Hard | Polluted Wasteland • Nightmare Carnival | |
| Unreleased | ||
|---|---|---|
| Undefined | Backwoods • Battlefront • Castle Outskirts • Dusty Ruins • Fogged Lair • Fraction Zone • Gingerbread Town • Hallows Ville • Mars • Petulance Ground • Pumpkin Patch • PVP_11 • PVP_3 • PVP_6 • PVP_8 • PVP_9 • Unknown Castle Map • Unreleased Halloween 2020 Map • Unreleased Tournament Map • Waste Ground • Weepers Gaol • Winterfall • WIP City | |