
Sk8 P4rk
Sk8 P4rk has been removed from the game as of the 22nd of September 2025 as it was part of the The Takeover Event.
This page has been preserved for historical purposes.
Description
Sk8 P4rk was a map themed around a skatepark. It was the event map for The Takeover Event. Like other event maps, this map had a specialized wave structure with special enemies. Players started with a varying amount of cash, based on the difficulty chosen. It had no unique rewards other than currency for The Takeover.
You only got cash if an enemy is killed, or in some cases, damaged by a specific amount of health. Additionally, the amount gained is a set amount of cash, which is not always equal to the enemy's health. Enemies split their cash between players, regardless of how much damage the player dealt to it. If, in a duo, one player did all the damage to an enemy, both players would receive 50% of the cash the enemy would normally give in solo. This means that in solo, you received 100% of the cash when an enemy is killed, or it was damaged enough. With each additional player, this is reduced to 50% in duo, 33% in trio and 25% in quad. If it is a decimal number, it got rounded up or down depending on the decimal value. If it was at least 0.5, it gets rounded up. If it was less than 0.5, it got rounded down.
All difficulties have health scaling of 20% in quad matches, but due to matches always being quad matches this is always applied. Starting from Master difficulty, Mutation is applied, which increases the health of an enemy by 10% every wave after its first appearance. In the Extreme difficulty, Jailed Towers is also applied, which jails a random tower type every wave starting from Wave 6. These modifiers will boost the rewards gained for Master and Extreme difficulty by 20%.
Design & Path
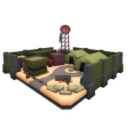
Sk8 P4rk was a daytime map inside a skatepark. The entire skatepark was surrounded by various colorful buildings and walls. The skatepark itself contained a few small buildings, stairs, fences, walls, skateboards, lamps and obstacles. Graffiti could be seen on the sides of buildings, which had multiple depictions of Roblox or Tower Defense Simulator characters.
The path starts and ends at a black entrance inside the buildings. It consists of several 90 degree turns, with multiple grey arrows showing which direction the enemies are going in.
Interactive Map
Preset Loadouts
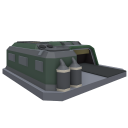
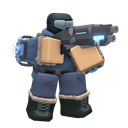
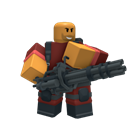
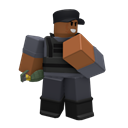
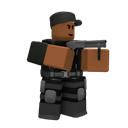
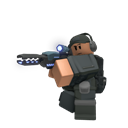
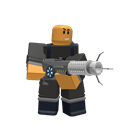
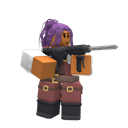
Each difficulty allowed the player to pick from one of three preset loadouts. Alongside these preset options, players could opt to use their current loadout as the first choice. However, if one's loadout contained no towers, this option will be unavailable.


























Rewards
The game calculated how many 

Rewards are calculated as:
| Coins Reward | EXP Reward |
|---|---|
| Noob Rewards | |
|
|
| Pro Rewards | |
|
|
| Master Rewards | |
| ( |
( |
| Extreme Rewards | |
| ( |
( |
Triumphing Sk8 P4rk can give out an additional reward, which can be a crate, consumable or ticket. The reward given is based on difficulty selected. They are meant to be guaranteed, though due to a bug this does not always happen. Additionally, items are sometimes not given out. These items are:
- Common (50%)
- Grenade (1-2)
- Flash Bang (1-2)
- Molotov (1-2)
- Uncommon (30%)


- Rare (20%)
- Low Grade Crate

- Barricade
- Supply Drop
- Sandcastle (1-3)


- Common (65%)
- Grenade (1-3)
- Flash Bang (1-3)
- Molotov (1-3)
- Uncommon (20%)
- Low Grade Crate
- Barricade (1-2)
- Supply Drop (1-2)
- AirStrike (1-2)
- Sandcastle (1-3)
- Rare (10%)
- Legendary (5%)
- Common (55%)
- Low Grade Crate
- Barricade (2-4)
- Supply Drop (2-4)
- Uncommon (35%)
- Cooldown Flag (2-4)
- Range Flag (2-4)
- Damage Flag (2-4)
- Mid Grade Crate
- Sandcastle (1-3)
- Rare (10%)
- Napalm Strike (2-3)
- Blizzard Bomb (2-3)
- High Grade Crate
- Heatwave (2-3)
- Common (47.39%)
- Low Grade Crate
- Barricade (2-4)
- Supply Drop (2-4)
- Uncommon (28.44%)
- Cooldown Flag (2-4)
- Range Flag (2-4)
- Damage Flag (2-4)
- Mid Grade Crate
- Sandcastle (1-3)
- Rare (18.96%)
- High Grade Crate
- Napalm Strike (2-3)
- Blizzard Bomb (2-3)
- Heatwave (2-3)
- Legendary (4.74%)
- Custom (0.47%)
As the map was added for Roblox's The Takeover, it gave out 
| Difficulty | Base Reward | 2x Reward |
|---|---|---|
| Noob | |
|
| Pro | |
|
| Master | |
|
| Extreme | |
|
Badges
There are also a few badges which can be obtained when playing this map. These are:


Wave Structure
The formula for calculating wave bonus on each wave in Noob and Pro is:
- (


The formula for calculating wave bonus on each wave in Master is:
- (
The formula for calculating wave bonus on each wave in Extreme is:
- (
The wave clear bonus appears when every enemy from that wave was killed in the Noob difficulty. It is 20% of the wave bonus.
The waves in Sk8 P4rk cannot be skipped. They follow these timings:
| Wave | Noob | Pro | Master | Extreme |
|---|---|---|---|---|
| 1-8 | 1:00 | 1:00 | 1:00 | 1:00 |
| 9 | 1:00 | 1:00 | 1:00 | 1:20 |
| 10 | ∞ | 1:20 | 1:20 | 1:20 |
| 11 | 1:30 | 1:20 | 1:20 | |
| 12 | 1:40 | 1:20 | 1:20 | |
| 13-14 | 2:00 | 1:20 | 1:20 | |
| 15 | ∞ | 1:20 | 1:20 | |
| 16-19 | 1:20 | 1:40 | ||
| 20-22 | 2:00 | 1:40 | ||
| 23-24 | 2:00 | 2:00 | ||
| 25 | ∞ | 2:00 | ||
| 26-28 | 2:30 | |||
| 29 | 3:20 | |||
| 30 | ∞ |
Bolded names indicate an enemy type's debut.
| Wave | Commander Dialogue | Enemy Type & Amount | |
|---|---|---|---|
| 1 |  |
Heads up! We've got some enemies invading the skatepark. |
4x Normal, 2x Speedy, 2x Normal |
 |
It shouldn't be too much to handle...I hope. | ||
| 2 | - | 2x Slow, 3x Normal, 5x Speedy, 2x Slow 4x Normal | |
| 3 | |
Looks like more zombies are starting to pile in. |
1x Normal Boss (Boss), 8x Speedy, 6x Normal |
|
And they even have a Normal Boss leading them! | ||
| 4 | - | 5x Slow, 1x Normal Boss, 5x Slow, 10x Normal | |
| 5 |  |
Don't relax just yet, here come some more! |
5x Breaker2, 1x Normal Boss, 5x Breaker2, 1x Normal Boss, 5x Breaker2 |
|
Come get some! | ||
| 6 | - | 2x Normal Boss, 1x Necromancer (Boss), 12x Breaker2, 10x Slow | |
| 7 |  |
Watch out for Necromancers and make sure to shoot their minions in the face. |
3x Bolt, 4x Breaker2, 1x Necromancer, 3x Bolt, 4x Breaker2, 1x Necromancer, 3x Bolt, 4x Breaker2 |
|
Then shoot them again! | ||
| 8 | - | 3x Normal Boss, 12x Slow, 1x Necromancer, 1x Speedy Boss, 10x Bolt, 1x Necromancer, 6x Bolt | |
| 9 | |
Their numbers are beginning to thin out, but stay alert. |
1x Speedy Boss, 1x Slow Boss (Boss), 5x Normal Boss, 2x Necromancer, 3x Bolt, 2x Breaker2 (Nimble), 3x Bolt, 2x Breaker2 (Nimble), 3x Bolt, 2x Breaker2 (Nimble), 3x Bolt, 2x Breaker2 (Nimble) |
|
You're doing great. | ||
| 10 | |
They're throwing everything they've got! |
1x Speedy Boss, 5x Bolt, 1x Speedy Boss, 5x Bolt, 2x Slow Boss, 1x Brute, 1x Necromancer, 4x Breaker2, 1x Necromancer, 4x Breaker2, 1x Necromancer, 4x Breaker2 |
|
There's the Brute! Take it down! | ||
| Lose Dialogue | |||
   |
One icon and dialogue is randomly chosen upon defeat:
•We're toast! | ||
| Wave | Commander Dialogue | Enemy Type & Amount | |
|---|---|---|---|
| 1 | |
These guys don't know when to quit! |
4x Speedy, 8x Normal, 4x Speedy |
|
I hope they aren't here for me! | ||
| 2 | - | 8x Speedy, 5x Slow, 10x Normal | |
| 3 | |
They're really come prepared. |
8x Slow, 12x Normal (Bloated), 10x Speedy (Bloated) |
|
We might have a bit of a tough fight coming. | ||
| 4 | - | 10x Speedy (Bloated), 1x Ghoul (Boss), 10x Slow (Bloated) | |
| 5 | |
The report mentioned something 'dangerous' is coming, but I spilled my coffee on it this morning! |
7x Speedy (Bloated, Nimble), 5x Enraged, 1x Ghoul (Bloated), 5x Enraged, 8x Slow (Bloated), 5x Enraged, 1x Ghoul (Bloated) |
|
Dispatcher is going to kill me! You can handle this, right? | ||
| 6 | - | 1x Ghoul, 10x Armored, 1x Ghoul, 8x Slow (Bloated), 1x Ghoul | |
| 7 | |
I think we are almost half way there! Keep it up! |
6x Enraged (Bloated), 10x Breaker2, 8x Armored (Bloated), 10x Breaker2 |
|
You are doing great! | ||
| 8 | - | 10x Enraged (Bloated), 10x Breaker2 (Bloated), 12x Armored (Bloated) | |
| 9 | |
Hey! I think they're finally gone-!. |
8x Breaker2, 1x Reaver, 6x Armored (Bloated), 1x Necromancer (Stun Immune, Freeze Immune), 10x Breaker2 (Bloated) 1x Reaver |
|
Ah...Nope. Still coming. | ||
| 10 | - | 8x Armored (Bloated), 3x Reaver, 2x Necromancer (Stun Immune, Freeze Immune), 8x Enraged (Bloated), 10x Breaker2, 6x Ghoul (Bloated), 2x Reaver | |
| 11 | |
It's a Living Experiment! I knew they were coming for me! |
1x Living Experiment (Boss), 8x Hazmat (Bloated), 2x Reaver, 1x Necromancer (Bloated, Stun Immune, Freeze Immune), 2x Reaver, 8x Breaker2 (Bloated), 2x Reaver, 1x Necromancer (Bloated, Stun Immune, Freeze Immune) |
|
I will take more than this! | ||
| 12 | - | 1x Reaver (Bloated), 1x Necromancer (Bloated, Stun Immune, Freeze Immune), 1x Reaver (Bloated), 1x Necromancer (Bloated, Stun Immune, Freeze Immune), 1x Living Experiment (Stun Immune, Freeze Immune), 12x Armored (Bloated), 1x Living Experiment (Stun Immune, Freeze Immune) | |
| 13 | |
Failed Experiment incoming! |
1x Failed Experiment, 10x Enraged (Bloated), 10x Breaker2 (Bloated), 1x Living Experiment (Bloated), 5x Necromancer (Stun Immune, Freeze Immune), 8x Armored (Bloated), 1x Failed Experiment |
|
They're sending out their big guns! Let's match them! | ||
| 14 | - | 1x Failed Experiment, 1x Living Experiment (Bloated), 4x Reaver, 3x Necromancer (Bloated, Stun Immune, Freeze Immune), 1x Failed Experiment, 8x Armored (Bloated, Nimble), 1x Failed Experiment, 6x Enraged (Bloated), 1x Living Experiment (Bloated), 6x Enraged (Bloated) | |
| 15 | |
Is that Patient Zero?! Can he even skate?! |
1x Failed Experiment, 10x Enraged (Bloated), 2x Reaver (Bloated), 6x Ghoul (Bloated), 2x Reaver (Bloated), 1x Living Experiment, 1x Patient Zero, 5x Necromancer (Bloated, Stun Immune, Freeze Immune), 1x Failed Experiment, 10x Hazmat |
|
Well, he's not going to skate better than me! Take him down! | ||
| Lose Dialogue | |||
|
One icon and dialogue is randomly chosen upon defeat:
•We're toast! | ||
| Wave | Commander Dialogue | Enemy Type & Amount | |
|---|---|---|---|
| 1 | |
We've got movement, and a whole lot of it! |
7x Abnormal, 4x Quick |
|
This isn't how I wanted to go! | ||
| 2 | - | 3x Quick, 3x Abnormal, 2x Heavy, 3x Quick, 3x Abnormal | |
| 3 | |
It looks like they're...adapting? |
2x Quick, 5x Heavy, 2x Quick, 6x Abnormal, 2x Quick, 3x Heavy |
|
We need headquarters to look into this, but I think they've mutated. | ||
| 4 | - | 1x Elite Abnormal (Boss), 12x Abnormal, 8x Quick (Bloated) | |
| 5 | |
Yeah, they're way tougher than before! |
4x Heavy, 6x Breaker2, 4x Heavy, 6x Breaker2 |
|
Can't they hold back a bit?! | ||
| 6 | - | 1x Elite Abnormal (Corpse), 8x Heavy, 8x Breaker2 | |
| 7 | |
Molten enemies coming in! |
3x Molten (Corpse), 1x Elite Abnormal (Bloated), 3x Molten (Corpse), 1x Elite Abnormal (Bloated), 6x Molten |
|
Why are they here?! | ||
| 8 | - | 8x Heavy (Bloated, Nimble, Corpse), 4x Elite Abnormal (Bloated), 10x Molten | |
| 9 | |
Molten Golem spotted! |
10x Breaker2, 2x Elite Abnormal (Bloated, Aggro), 1x Molten Golem (Boss) |
|
We need more firepower for this one! | ||
| 10 | - | 5x Molten (Bloated), 2x Elite Abnormal (Bloated, Aggro), 1x Molten Golem 2x Elite Abnormal (Bloated, Aggro), 5x Molten (Bloated) | |
| 11 | |
We're still hanging in there, at least for now. |
7x Molten (Corpse), 8x Elite Hazmat, 3x Elite Abnormal (Bloated, Nimble), 7x Molten |
|
You're doing a great job so far. | ||
| 12 | - | 1x Molten Golem, 6x Molten (Corpse), 1x Molten Golem, 6x Elite Hazmat | |
| 13 | |
A Molten Necromancer is here! And they're summoning demons! |
1x Molten Golem, 12x Breaker2 (Corpse), 1x Molten Necromancer (Boss) 5x Molten (Nimble), 10x Heavy (Bloated) |
|
Kill them! And then kill them again! | ||
| 14 | - | 6x Molten Hound, 1x Molten Golem, 5x Elite Hazmat (Bloated), 1x Molten Golem, 5x Elite Hazmat (Bloated) | |
| 15 | |
I think we're almost halfway through. |
1x Molten Golem, 1x Molten Necromancer, 5x Breaker4, 1x Molten Golem, 1x Molten Necromancer, 5x Breaker4, 1x Molten Necromancer |
|
If I don't make it, tell Dispatcher that it was Scout's fault. | ||
| 16 | - | 2x Molten Golem, 1x Molten Mech, 4x Molten Hound, 1x Molten Mech, 4x Molten Hound, 12x Elite Hazmat | |
| 17 | |
I feel that there's a bigger threat coming. |
1x Bulwark (Boss), 1x Tanker, 2x Molten Necromancer, 6x Molten Hound, 12x Molten (Bloated) |
|
Here comes a Bulwark! We're going to need to focus on our firepower to take it down. | ||
| 18 | - | 3x Molten Mech (Corpse), 1x Tanker, 1x Bulwark, 1x Molten Necromancer, 20x Elite Molten | |
| 19 | - | 8x Elite Molten (Corpse), 5x Molten Hound, 1x Bulwark (Bloated), 4x Molten Necromancer (Bloated), 2x Molten Mech (Bloated) | |
| 20 | |
Headquarters confirmed that a Molten Executioner is on its way! |
2x Tanker, 2x Bulwark, 6x Elite Molten (Corpse), 1x Molten Executioner (Boss), 6x Elite Hazmat (Bloated), 2x Molten Necromancer (Bloated) |
|
Come on! Give us a break! | ||
| 21 | |
Is that a Molten Summoner?! |
10x Breaker4 (Nimble), 1x Bulwark (Bloated, Corpse), 2x Molten Necromancer (Bloated), 1x Molten Summoner (Boss), 12x Elite Molten |
|
Seriously! Where are they summoning those Molten from?! | ||
| 22 | - | 4x Molten Mech, (Corpse), 8x Molten Hound (Corpse), 6x Elite Molten (Nimble, Corpse), 6x Elite Hazmat, 1x Molten Executioner (Stun Immune), 6x Elite Hazmat | |
| 23 |  |
We're not out of the woods yet. Just a little longer. |
1x Bulwark (Stun Immune), 3x Molten Golem (Bloated), 1x Molten Summoner (Stun Immune), 1x Bulwark (Stun Immune), 3x Molten Golem (Bloated), 1x Molten Necromancer (Stun Immune, Bloated) |
|
I hope Nerd Duck didn't drink the rest of the coffee or else he'll become an endangered species. | ||
| 24 | - | 30x Elite Molten (Corpse), 1x Molten Executioner (Stun Immune, Bloated), 4x Molten Necromancer (Stun Immune), 2x Molten Mech, 4x Molten Necromancer (Stun Immune), 2x Molten Mech | |
| 25 | |
This is it! If we don't take out the Molten Warlord, he will destroy everything here! |
3x Molten Mech, 1x Tanker, 1x Molten Executioner (Stun Immune), 1x Tanker, 1x Molten Summoner (Stun Immune), 1x Molten Warlord (Boss), 4x Molten Necromancer, 10x Molten Hound, 25x Elite Molten |
|
Not on our watch! Let's do this! | ||
| Lose Dialogue | |||
|
One icon and dialogue is randomly chosen upon defeat:
•We're toast! | ||
| Wave | Commander Dialogue | Enemy Type & Amount | |
|---|---|---|---|
| 1 | |
We've received reports of enemies nearby. |
4x Abnormal, 4x Quick |
|
Should be uh-... easy. Right. | ||
| 2 | - | 7x Abnormal (Bloated) | |
| 3 | |
Oh man! Not the Fallen! |
3x Fallen Dreg, 6x Quick (Bloated) |
|
I just had to jinx myself! | ||
| 4 | - | 4x Quick (Bloated, Corpse), 1x Fallen Squire, 5x Abnormal (Bloated) | |
| 5 | |
What's going on?! How are the Fallen suppressing our units? |
1x Fallen Squire, 3x Fallen Dreg (Bloated), 1x Fallen Squire, 3x Fallen Dreg (Bloated) |
|
They've jailed our towers, we need to adapt! | ||
| 6 | - | 6x Fallen Dreg (Bloated), 1x Fallen Squire (Bloated), 5x Fallen Dreg (Bloated) | |
| 7 | |
It looks like the jailed towers change every wave. |
7x Quick (Bloated, Corpse), 5x Breaker2, 7x Quick (Bloated) |
|
You need to figure out how to work around it. | ||
| 8 | - | 4x Fallen, 1x Fallen Squire, 4x Fallen, 1x Fallen Squire | |
| 9 | |
The Fallen are releasing a Giant! |
10x Breaker2, 1x Fallen Giant (Boss), 7x Fallen |
|
This thing can't get through! | ||
| 10 | - | 3x Fallen Squire (Bloated, Aggro), 1x Fallen Giant, 8x Fallen | |
| 11 | |
We're still going strong. |
8x Fallen, 1x Fallen Giant, 5x Fallen Hazmat, 1x Fallen Giant |
|
When we get back, I'll order Pyro to hold a grill out for the whole team. | ||
| 12 | - | 6x Fallen (Corpse), 8x Fallen Hazmat, 10x Breaker2 (Bloated) | |
| 13 | |
Is that a ghost?! |
1x Possessed Armor, 4x Fallen, 6x Fallen Hazmat, 4x Fallen, 1x Possessed Armor, 4x Fallen |
|
Possessed Armor floating in! | ||
| 14 | |
Fallen Necromancer spotted! |
1x Possessed Armor, 5x Fallen (Bloated, Corpse), 1x Fallen Giant (Bloated), 1x Fallen Necromancer (Boss), 10x Fallen Hazmat |
|
Don't let them summon the spooky bones!... I mean skeletons! | ||
| 15 | - | 8x Corrupted Fallen, 1x Fallen Giant (Bloated), 1x Fallen Necromancer, 1x Fallen Giant (Bloated), 1x Fallen Necromancer | |
| 16 | - | 1x Fallen Hero, 5x Corrupted Fallen, 1x Fallen Hero, 5x Corrupted Fallen, 5x Possessed Armor | |
| 17 | - | 2x Fallen Hero (Corpse), 3x Possessed Armor, 2x Fallen Necromancer, 10x Corrupted Fallen, 2x Fallen Necromancer | |
| 18 | |
Massive wave incoming! |
1x Fallen Shield, 3x Fallen Giant, 15x Fallen Hazmat |
|
Time to lock and load! | ||
| 19 | - | 1x Fallen Shield, 1x Fallen Necromancer (Bloated), 3x Fallen Hero, 8x Breaker4, 2x Fallen Giant | |
| 20 | - | 3x Fallen Rusher, 2x Fallen Hero, 3x Corrupted Fallen, 1x Possessed Armor (Bloated), 3x Fallen Rusher, 2x Fallen Hero, 3x Corrupted Fallen, 1x Possessed Armor (Bloated) | |
| 21 | |
I think we're almost through this! |
4x Fallen Rusher (Corpse), 1x Fallen Shield (Bloated), 8x Fallen Hazmat, 1x Fallen Jester, 2x Fallen Necromancer (Bloated), 8x Corrupted Fallen |
|
Great job! | ||
| 22 | - | 1x Fallen Tank, 1x Fallen Shield (Bloated), 4x Breaker4, 1x Fallen Jester, 4x Breaker4, 4x Possessed Armor (Bloated) | |
| 23 | |
Fallen Guardians? What are they doing here? |
4x Fallen Rusher, 2x Fallen Hero (Bloated), 1x Fallen Shield, 4x Fallen Giant, 2x Fallen Guardian (Stun Immune, Freeze Immune), 15x Corrupted Fallen |
|
Something big is coming, I'm sure of it. | ||
| 24 | - | 1x Fallen Tank (Corpse), 8x Breaker4, 2x Fallen Necromancer (Bloated), 3x Fallen Shield (Aggro), 4x Breaker4, 4x Fallen Guardian (Stun Immune, Freeze Immune), 4x Fallen Necromancer (Bloated) | |
| 25 | |
They really aren't holding back! |
1x Fallen Tank (Corpse), 8x Breaker4, 2x Fallen Necromancer (Bloated), 1x Fallen Shield (Aggro), 8x Breaker4, 2x Fallen Necromancer (Bloated) |
|
And we won't either! | ||
| 26 | - | 1x Fallen Guardian (Stun Immune, Freeze Immune), 10x Corrupted Fallen (Bloated), 1x Fallen Guardian (Stun Immune, Freeze Immune), 10x Corrupted Fallen (Bloated), 1x Fallen Guardian (Stun Immune, Freeze Immune), 10x Corrupted Fallen (Bloated), 1x Fallen Guardian (Stun Immune, Freeze Immune) | |
| 27 | |
That's a Fallen Honor Guard! |
1x Fallen Tank, 4x Fallen Hero (Corpse), 8x Fallen Rusher, 1x Fallen Shield, 4x Fallen Giant, 1x Fallen Honor Guard (Boss), 8x Corrupted Fallen |
|
We need to get out of here! | ||
| 28 | - | 5x Fallen Rusher (Corpse), 1x Fallen Hero (Bloated), 1x Fallen Shield, 1x Fallen Guardian (Stun Immune, Freeze Immune), 1x Fallen Necromancer (Bloated), 5x Corrupted Fallen, 1x Fallen Hero (Bloated), 1x Fallen Shield, 1x Fallen Guardian (Stun Immune, Freeze Immune), 1x Fallen Necromancer (Bloated), 5x Corrupted Fallen | |
| 29 | |
Sorry, lost my cool. A Fallen Summoner was spotted ahead! |
1x Fallen Tank (Corpse), 2x Fallen Shield, 1x Fallen Guardian (Stun Immune, Freeze Immune), 2x Fallen Shield, 1x Fallen Guardian (Stun Immune, Freeze Immune), 1x Fallen Summoner (Boss), 3x Fallen Necromancer (Bloated) |
|
If they're here, that means the Fallen King can't be far behind. | ||
| 30 | |
This is it, it's all or nothing from here on out! |
2x Fallen Tank (Corpse), 1x Fallen Guardian (Stun Immune, Freeze Immune), 10x Corrupted Fallen (Bloated) 3x Fallen Shield, 1x Fallen Guardian (Stun Immune, Freeze Immune), 5x Fallen Giant, 1x Fallen King, 1x Fallen Guardian (Stun Immune, Freeze Immune), 15x Corrupted Fallen (Bloated) |
|
Let's show the Fallen King who he messed with! | ||
| Lose Dialogue | |||
|
One icon and dialogue is randomly chosen upon defeat:
•We're toast! | ||
Strategy
- The map provides multiple viable towers for the early-game.
- The Archer is a very effective tower due to its bouncing.
- Short range towers like the Shotgunner or Assassin can do quite well due to their decent DPS and AOE capabilities.
- Other towers like the Crook Boss and Trapper can also be quite useful.
- Later on, high DPS towers like the Minigunner, Necromancer, Mercenary Base or Accelerator can be used to deal with the higher health enemies.
- As Sk8 P4rk has a very high wave bonus, upgrading them should not be an issue.
- If you are using your own loadout, you can also bring the Farm in higher difficulties as they have more waves allowing you to farm more.
- As Sk8 P4rk has a very high wave bonus, upgrading them should not be an issue.
- In the Extreme Difficulty, Jailed Towers is added which will lock a tower type per player every wave starting from Wave 6.
- It is therefore heavily advised to place down multiple different towers instead of spending money on only one tower.
- It is possible to partially mitigate this by using mostly towers that bypass the jail effect in some form, such as Biologist, Hacker, Crook Boss or Mercenary Base.
- While the Commander does lose its ability to grant buffs when jailed, no other tower has this. This means support towers can be used mostly without issues.
- It is therefore heavily advised to place down multiple different towers instead of spending money on only one tower.
- Stalling towers such as the Freezer, Frost Blaster, Toxic Gunner, Sledger and Jester can be used to get extra DPS.
- You can also utilize Consumables, such as the Range Flag, Cooldown Flag and Damage Flag.
- You can also use the Supply Drop for extra income.
- This, however, is not required for triumphs, especially on the easier challenges.
Gallery
Thumbnails
-
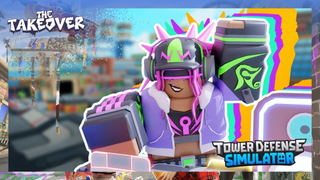 Sk8 P4rk on the game thumbnail.

Promotional Images
-
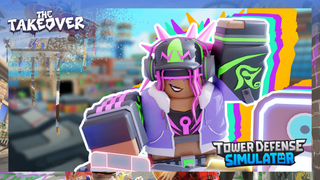 Sk8 P4rk on a promotional image.

Promotional Videos
-
The Takeover Trailer - Tower Defense Simulator

Miscellaneous
-
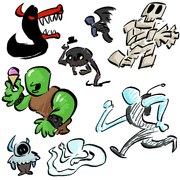 Tower Defense Simulator graffiti.
-
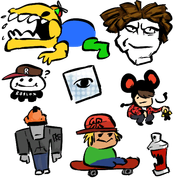 Roblox graffiti.
-
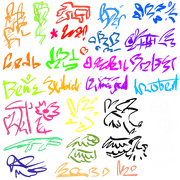 Generic graffiti.
-
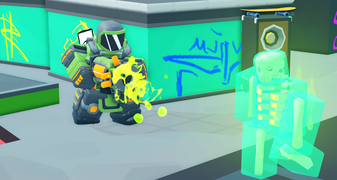 Sk8 P4rk in a v1.90.0 update log image.


Trivia
- Sk8 P4rk is the numeronym and homophone form for Skate Park.
- The graffiti present on this map contains various references to the game and Roblox. These are:
- The Forsaken Skull wearing a tophat.
- The Snow Minion.
- The Normal Boss holding an ice cream.
- The Fallen Seraph.
- The Polluted Wasteland II Circuit.
- The Evil Ducky.
- The Skeleton.
- KreekCraft.
- A Guest.
- A face of the default male Roblox avatar used since 2014.
- A Noob wearing a propeller hat.
- builderman.
- There is also a graffiti of an oddly shaped grey entity, which is supposed to be a Tower Defense Simulator graffiti. However, it is unclear what enemy or character it is supposed to represent.
- The Markmen loadout was oddly spelled differently in every difficulty it appeared in, with these being Marksmens, Marksmen and Marksman.
- The final wave theme that was used for every difficulty is the same theme as Corrupted Haz3mn's theme.
Update History
- 12 September 2025 - v1.74.3a
- Sk8 P4rk added.
- Bug: Commander's voicelines sometimes do not play.
- Bug: Jailed Towers modifier does not get applied upon restarting Extreme.
- Bug: Badges are sometimes not awarded.
- Bug: Matchmaking will sometimes either take an unreasonable amount of time to match up the player with anyone or will completely refuse to allow the player to start a match.
- 22 September 2025 - v1.74.3g
- Sk8 P4rk removed.
Notes
- ↑ Uses the wrong description.


| PVP | ||
|---|---|---|
| Easy | Crash Course • Judging Hall • Laser Stadium • Warm Land | |
| Normal | Desert Oasis • Distant Shapes • Opulent Remains | |
| Sandbox Mode | ||
|---|---|---|
| Hard | Classic Candy Cane Lane • Classic Castle • Classic Forest Camp • Classic Island Chaos • Classic Winter | |
| Insane | Badlands • Rotfield | |
| Special | Dev • Headache Headquarters | |
| Story Exclusive | ||
|---|---|---|
| Easy | Abandoned City | |
| Normal | Severing Connection • Tutorial | |
| Removed | ||
|---|---|---|
| Undefined | Candy Cane Lane • Doomspire • Island Chaos • Subzero • Castle • Mount Amillion • End of the Line • Canyon • Castle Outskirts • Candy Valley • Fungi Forest • Freight Fright • Graveyard • Winter • Robloxia • Ancient Colosseum • Highlands • Voidlands • PVP | |
| Easy | PVP_1 • PVP_2 • PVP_3 • PVP_4 • PVP_5 • PVP_6 • PVP_7 • PVP_8 • PVP_9 • PVP_10 • PVP_11 | |
| Hard | Polluted Wasteland • Nightmare Carnival | |
| Unreleased | ||
|---|---|---|
| Undefined | Backwoods • Battlefront • Castle Outskirts • Dusty Ruins • Fogged Lair • Fraction Zone • Gingerbread Town • Hallows Ville • Mars • Petulance Ground • Pumpkin Patch • PVP_11 • PVP_3 • PVP_6 • PVP_8 • PVP_9 • Unknown Castle Map • Unreleased Halloween 2020 Map • Unreleased Tournament Map • Waste Ground • Weepers Gaol • Winterfall • WIP City | |