Charge
Charge was previously removed on the 29th of October 2020, though it has been made available through the Sandbox mode later.
It is not accessible anywhere else in the game. This page will attempt to include information about both the version before removal and its re-added version.

- New fast enemy incoming!
- ―Beginning of Wave 26 (Golden)
Description
The Charge is a very fast enemy that appeared in Golden mode, which is only accessible through Sandbox mode. It is noticeably faster than most enemies in the game. However, it has low health compared to other enemies that spawn around the same time in Golden mode. It has the Stun Immunity, meaning it only gets slowed down by stuns instead of being stunned and it cannot be knocked back.
The Charge could be spawned from the Mystery upon its death in Golden mode, from wave 27 onwards.
Appearance
The Charge has a red granite torso and legs, with 67% of its head and left arm being neon blue. It is slightly smaller than an average enemy. The rest of its head and right arm is neon red. On its torso was a neon light blue lightning bolt. It wears white snow goggles as well as two metal armbands around its arms, one higher on the blue arm and the other lower on the red arm. Blue sparks are emitted from its torso. It is faceless.
The Charge had a red granite torso and legs, with 67% of its head and left arm being neon blue. It was slightly smaller than an average enemy. The rest of its head and right arm was neon red. On its torso was a neon light blue lightning bolt. It wore white snow goggles as well as two metal armbands around its arms, one higher on the blue arm and the other lower on the red arm. Blue sparks were emitted from its torso.
Strategy
- Using towers that can slow down the Charge, such as the Electroshocker, Frost Blaster, Pyromancer and Freezer, are highly recommended.
- Be aware that stunning towers like the Electroshocker will only slow the Charge down instead of stunning it.
- Charges mostly spawn in groups, so splash damage towers such as the Rocketeer and Mortar are recommended. You may also want other towers with high range, such as the Turret or Ranger, to assist with any Charges that survive.
- Placement is crucial. Even with a tower's high range, the Charge can still pass through if the tower does not have enough map coverage.
- Using the Commander to boost firerate will help.
- The Military Base's Tanks and Railgun Tanks can absorb damage from damaged Charges quite easily while also being able to damage them.
Gallery
Other Variants
-
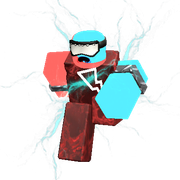 Unused Charge appearance (added 29 October 2020)
 -
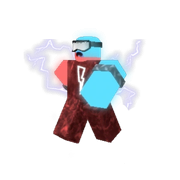 First version (13 October 2019 – 29 October 2020)


Corpse Variants
-
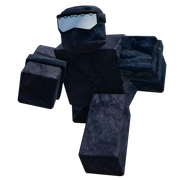 Second Corpse variant, current version (12 March 2025 – Present)

Trailers
-
Charge in the game trailer.

Miscellaneous
-
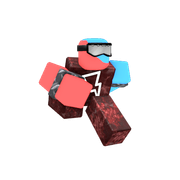 Charge on its Index icon.

Trivia
- It was hinted that the Charge may be a fusion between the Bolt and Glitch, judging by its asymmetrical looks.
- The Charge originally had a more stable running animation compared to the Bolt.
- When the Uber Mystery was in the game, it had a chance to spawn the Charge on Fallen mode when it died, despite the Charge only naturally spawning on Golden mode.
- The Charge's goggles are a re-textured version of the Laser Spec Special Forces Goggles accessory from the Roblox catalog.
Update History
- 13 October 2019 - Release v1.0.0
- Charge added.
- 14 February 2020 - Release v1.7.1
- Partial Electric Immunity added.
- 29 October 2020 - Overhaul v1.0
- Charge removed.
- NOTE: While the Charge was removed in the Overhaul Update, multiple changes were made to it, though they could never be seen in-game due to its removal. These are:
- Animation changed.
- Partial Electric Immunity replaced with Energy Immunity.
- 17 December 2024 - v1.46.4
- Charge now appears in Golden mode, if activated through Sandbox mode.
- Because of changes made with updates, its appearance has been updated and its Partial Electric Immunity has been replaced with the Stun Immunity.
- Charge now appears in Golden mode, if activated through Sandbox mode.
- 17 December 2024 - v1.46.5
- Charge no longer appears in Golden mode, as it has been removed.
- 12 February 2025 - v1.53.3a
 | ||
|---|---|---|
| Previous Debut | Current Debut | Next Debut |
| Shadow Boss Wave 24 |
Charge Wave 26 |
Mystery Boss Wave 29 |

| Legacy Enemies | ||
|---|---|---|
| Replaced | Blighted • Boomer 1 • Necromancer 2 • Mystery 2 • Gravekeeper • Super Mystery • Ultra Mystery • Uber Mystery • Ninja • Frost Hero • Strong | |
| Pre-MEGA | Carrier • Swarm • Tank 2 • Boomer 2 • Controlled • Shrike Crystal • Rusted • Witch Doctor • Tombstone • Frozen • Deep Freeze • Frost Hero | |
| Polluted Wasteland | Radioactive • Wasted Boss • Amalgamation • Rusher • Splitter • Split • Nuclear Fallen King | |
| Hidden Wave (Legacy) | Glitched Giant • Bug • Bruh • SCT • Jaxe • Mechanical Rot • Frost Hero • Developer 1 • Developer 2 • Developer 3 • Creator • A • B • C | |
| Other | Void • First Form | |